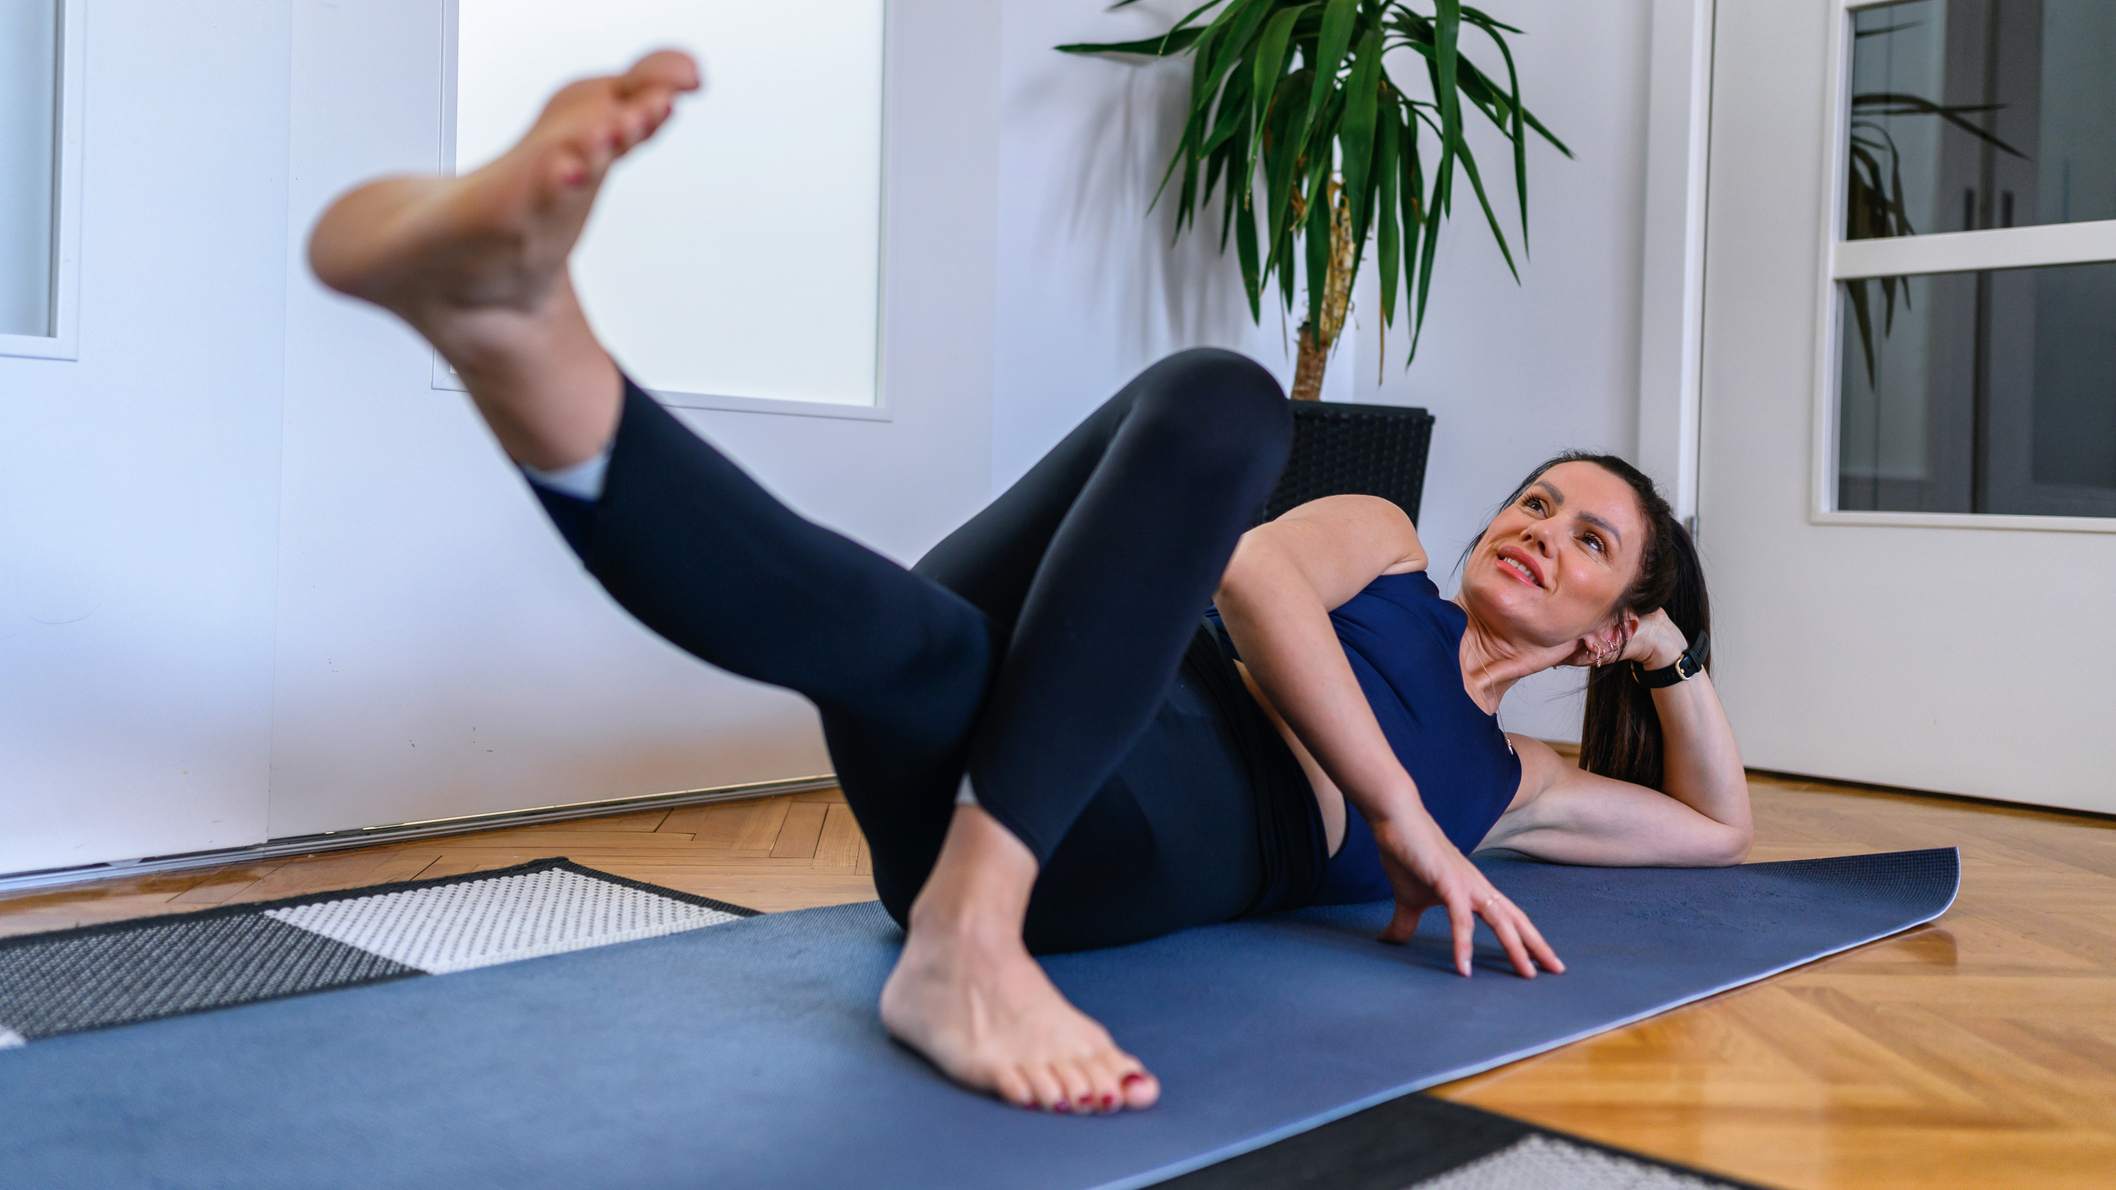
You probably experience soreness in your hips—I certainly do after long periods of sitting at my desk. But did you know this tightness can sometimes result in a lack of mobility?
I spoke to BODYBAR Pilates' Jill Drummond, a NASM-certified personal trainer and Pilates instructor, who explained that your hips move in three planes of motion, and you can have good mobility in some types of movements, but not others.
“The hips are a ball-and-socket joint, uniquely built to provide a wide range of motion,” says Drummond. “This design allows us to move the leg in multiple directions: flexion, extension, abduction, adduction and rotation. Together, these movements enable our bodies to function in all major planes of motion.”
Drummond explains that when we sit for extended periods, our hips remain fixed in one position, causing the muscles around them to tighten. Over time, this restriction can lead to a loss of flexibility and the ability to move freely in all directions.
Drummond also notes that it isn’t just sitting that can cause mobility issues. Muscle imbalances, injuries, aging and degeneration, or overall deconditioning can exacerbate tight and sore hips.
“To address these issues, it’s not only important to stretch but also to focus on improving cardiovascular fitness and building muscular strength, especially in the core and lower body. Strengthening these areas helps restore balance, support the hips and improve overall mobility,” says Drummond.
How to test hip mobility
Drummond has provided five ways to assess your hip mobility. Without the help of an in-person physical therapist it’s hard to say what’s limited, but these tests will help you to keep track of changes over time.
Start your week with achievable workout ideas, health tips and wellbeing advice in your inbox.
How to test hip flexion
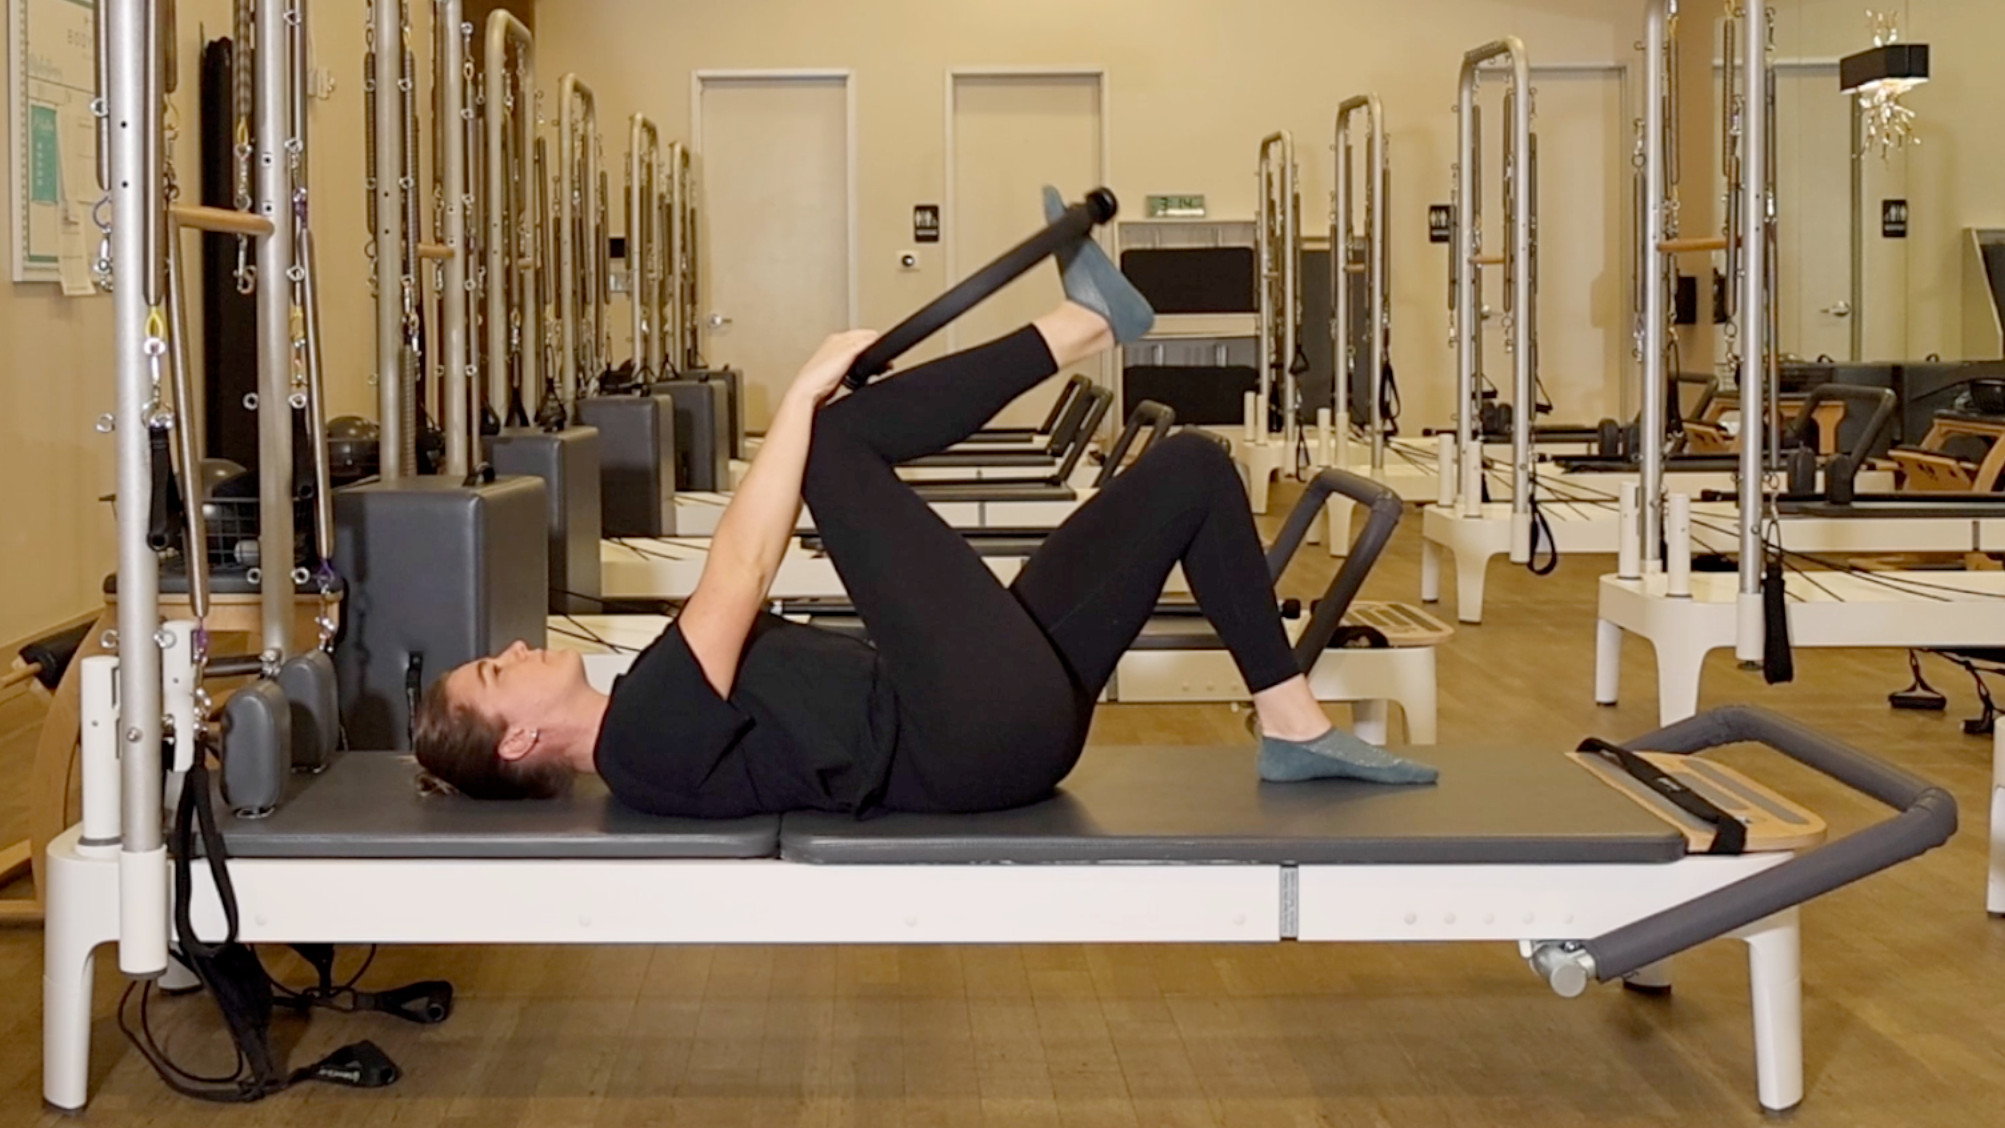
- Lie on your back with your knees bent and your feet on the mat. Allow your shoulders, upper back and hips to be heavy into the mat, while maintaining a slight curve in your lower back.
- Bend one knee, placing your hands just below the knee or using a prop such as a Pilates magic circle (pictured) to support your foot. Draw your knee into the chest maintaining the same spinal position. Bring the knee in as far as you can maintain heavy shoulders, upper back and hips, without the back overarching.
- If you experience limited movement or discomfort in your lower back or thigh, it may indicate tight hip flexors, hamstrings, or a lack of mobility in the hip joint.
- For those who are more flexible, extend the non-stretching leg straight to the mat and omit the prop.
How to test hip extension
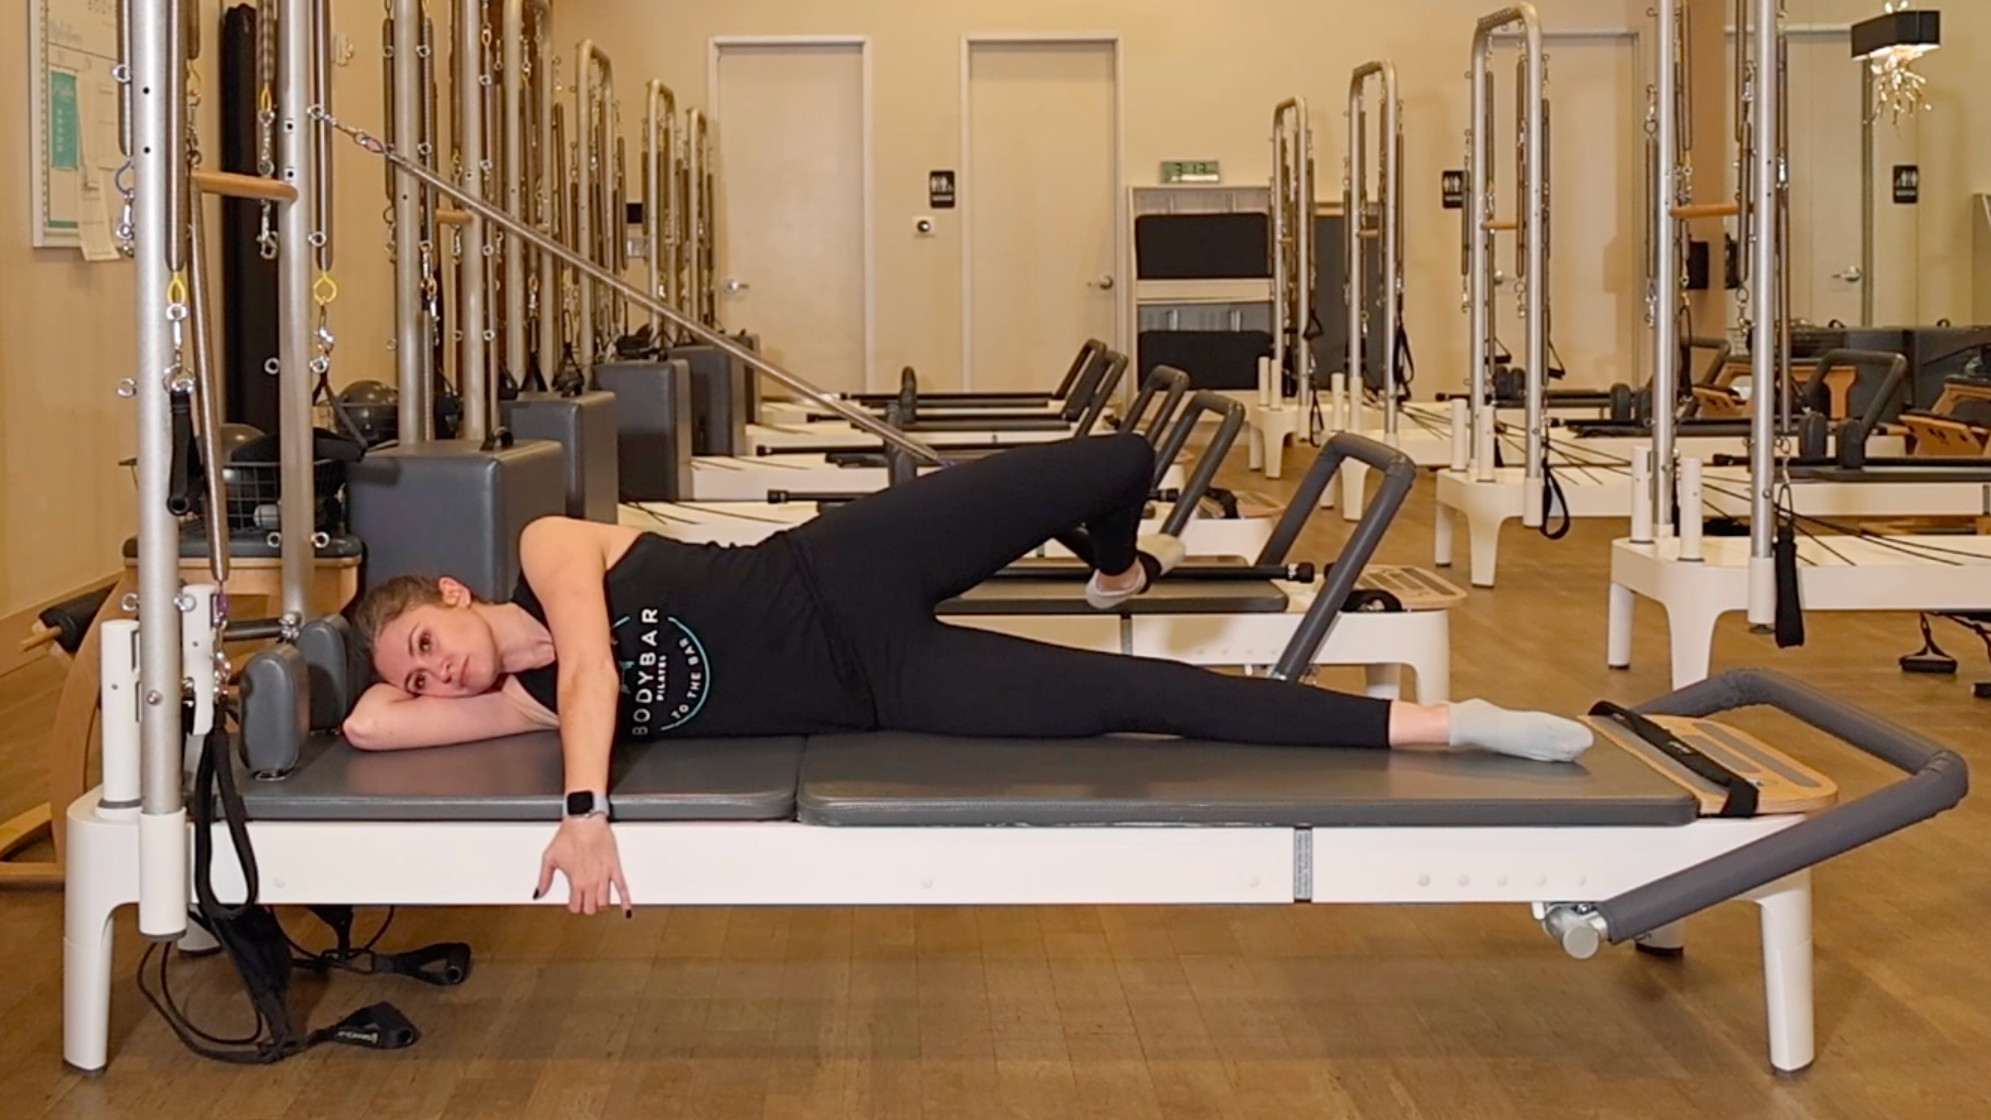
- Lie on your side with your head supported by your lower arm.
- Bend the knee of your top leg. Reach your foot behind you toward the floor as your knee and hip rotate toward the ceiling. Avoid overarching your lower back.
- If you experience limited movement, it may indicate tight hip flexors or a lack of mobility in the hip joint.
This is not only a test of hip extension, but it can also act as an effective stretch for increasing your hip mobility, especially when performed with the assistance of Pilates tower springs, as pictured here.
How to test hip abduction
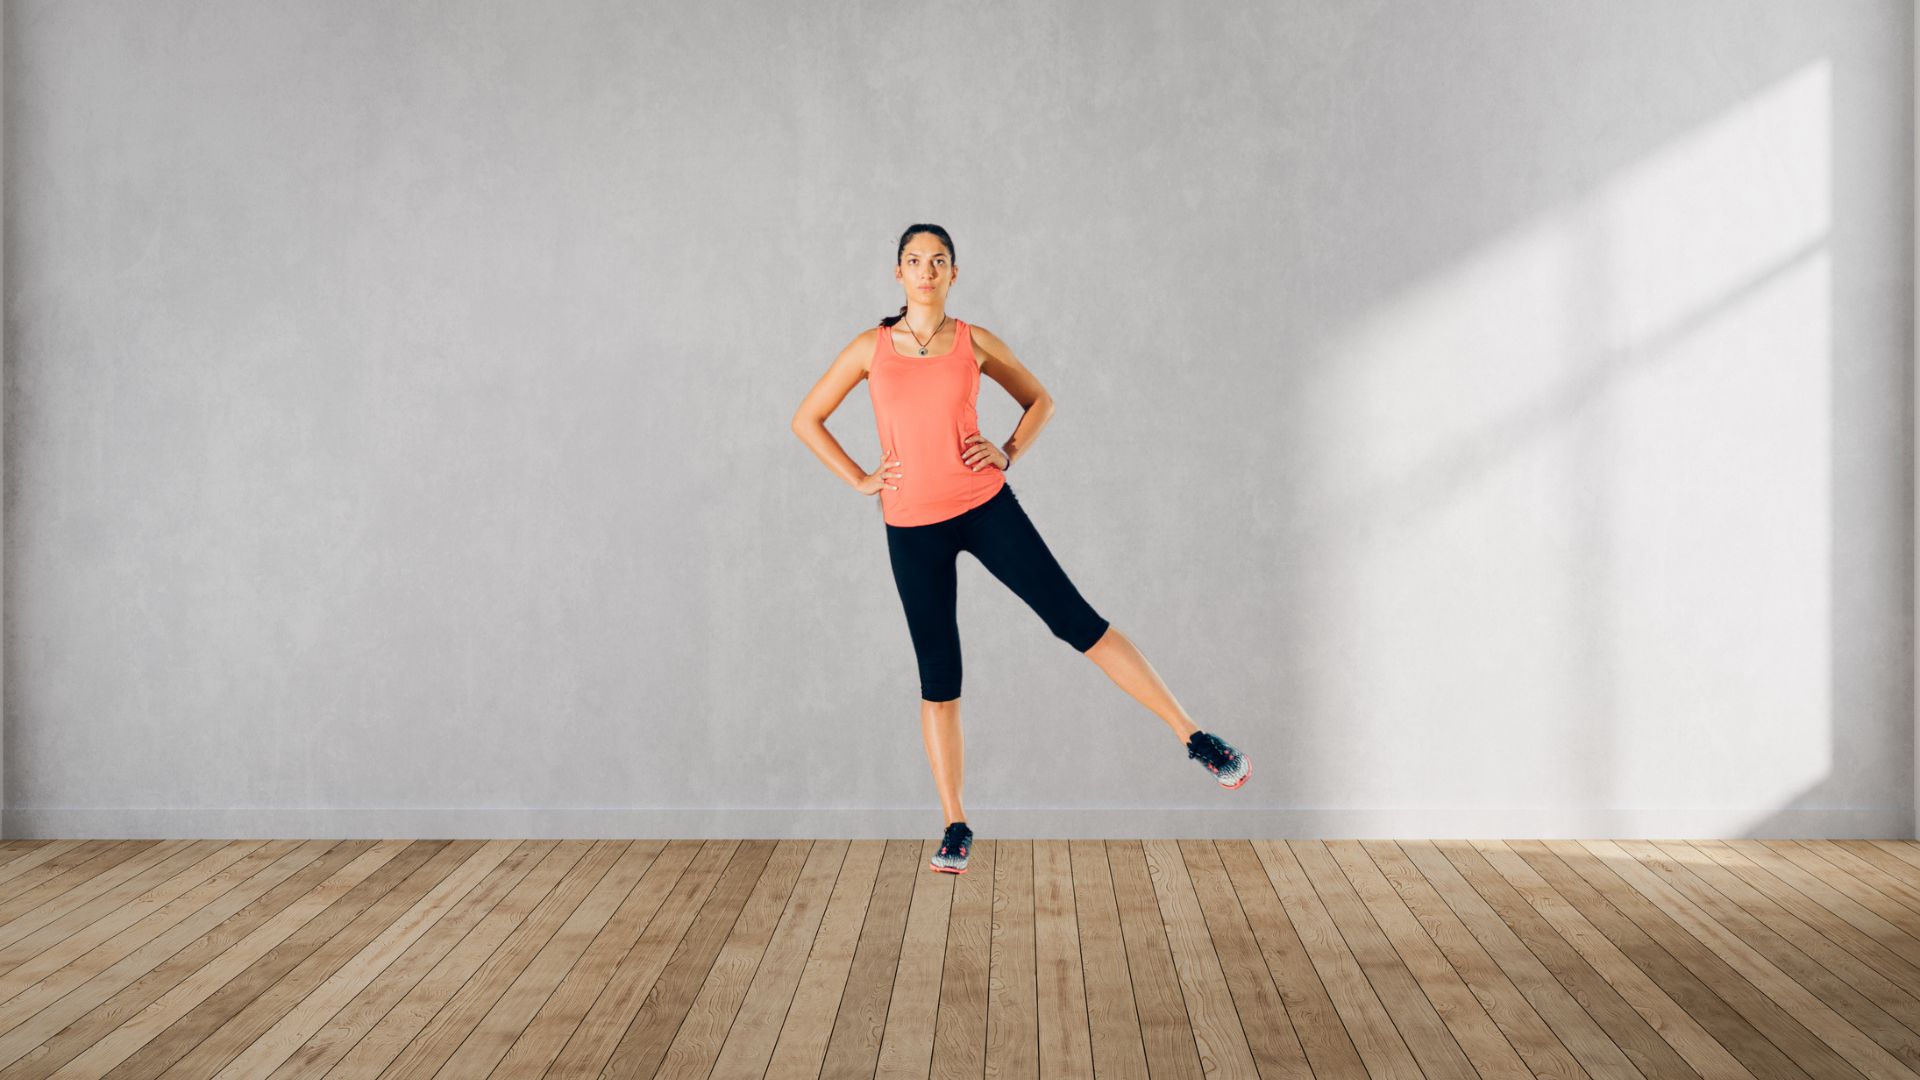
- Stand facing away from a wall.
- Connect your heels, hips and shoulders to the wall.
- Shift your weight into one leg (hold on to the back of a chair if balance support is needed), and lift the opposite leg to the side, sliding the heel along the wall.
- Do not allow your hips or shoulders to move or rotate away from the wall. As mobility improves, range of motion will increase.
How to test hip adduction
- Lie on your side with the bottom leg straight and the knee of your top leg with the foot flat on the floor in front of you.
- Lift the bottom leg.
- The height of the bottom leg indicates your mobility.
How to test hip rotation
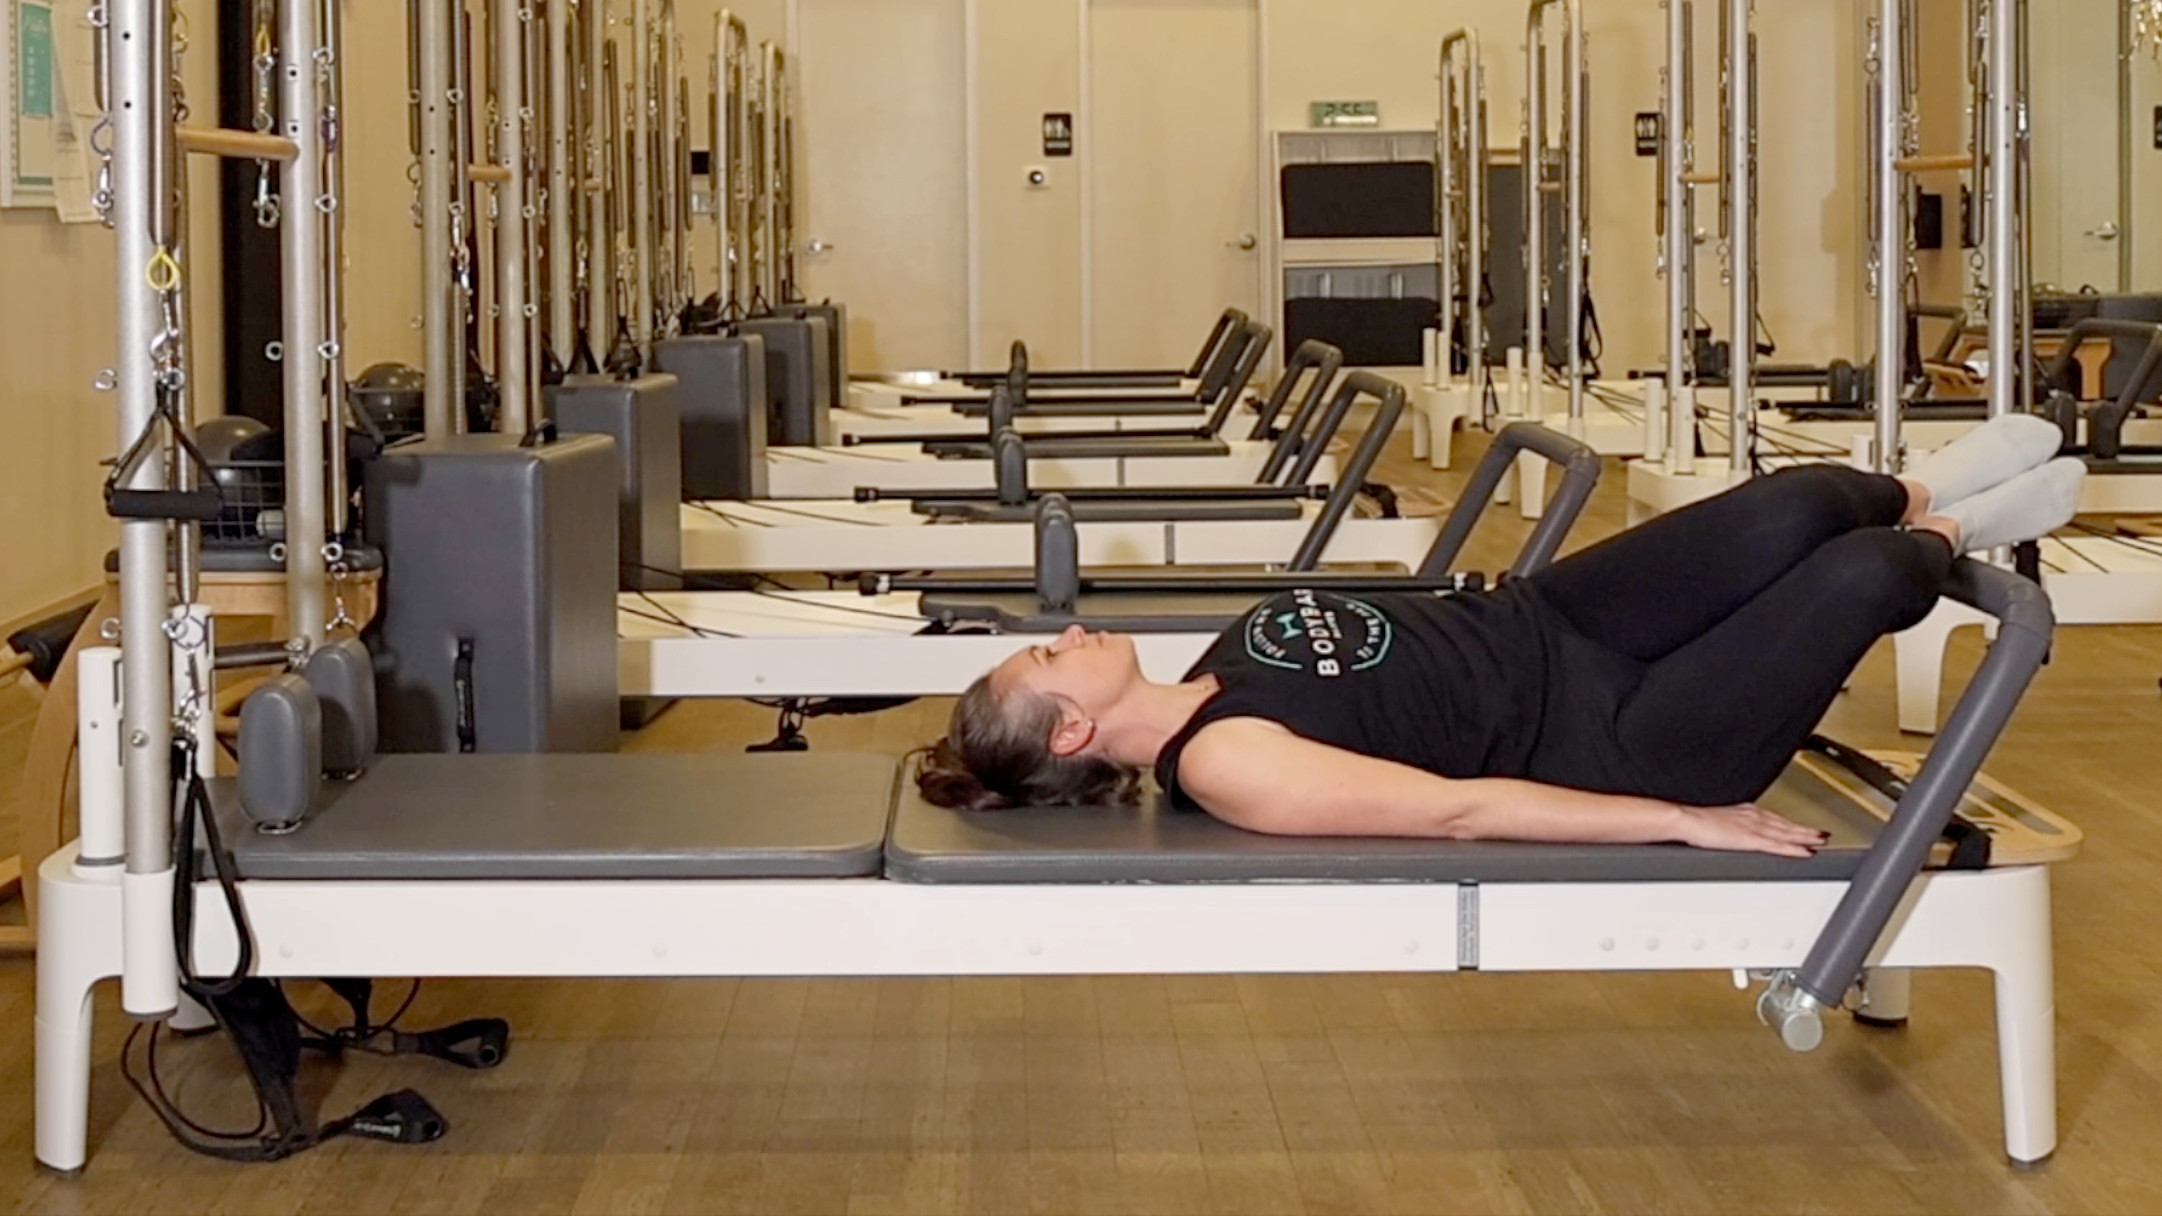
- Lie on your back with your knees bent and your feet elevated on a step or small platform. Your arms should be relaxed and extended at your sides.
- Anchor your head, shoulders and hips to the mat, and lower your knees from side to side like windshield wipers.
- If you experience limited movement or are unable to keep your hips anchored to the mat, it may indicate tight hip abductors and adductors, or a lack of mobility in the hip joint.
- If you are more mobile, this test can be performed with your feet on the floor. It also acts as an effective stretch for improving hip mobility.
Exercises to improve hip mobility
1. Supine butterfly
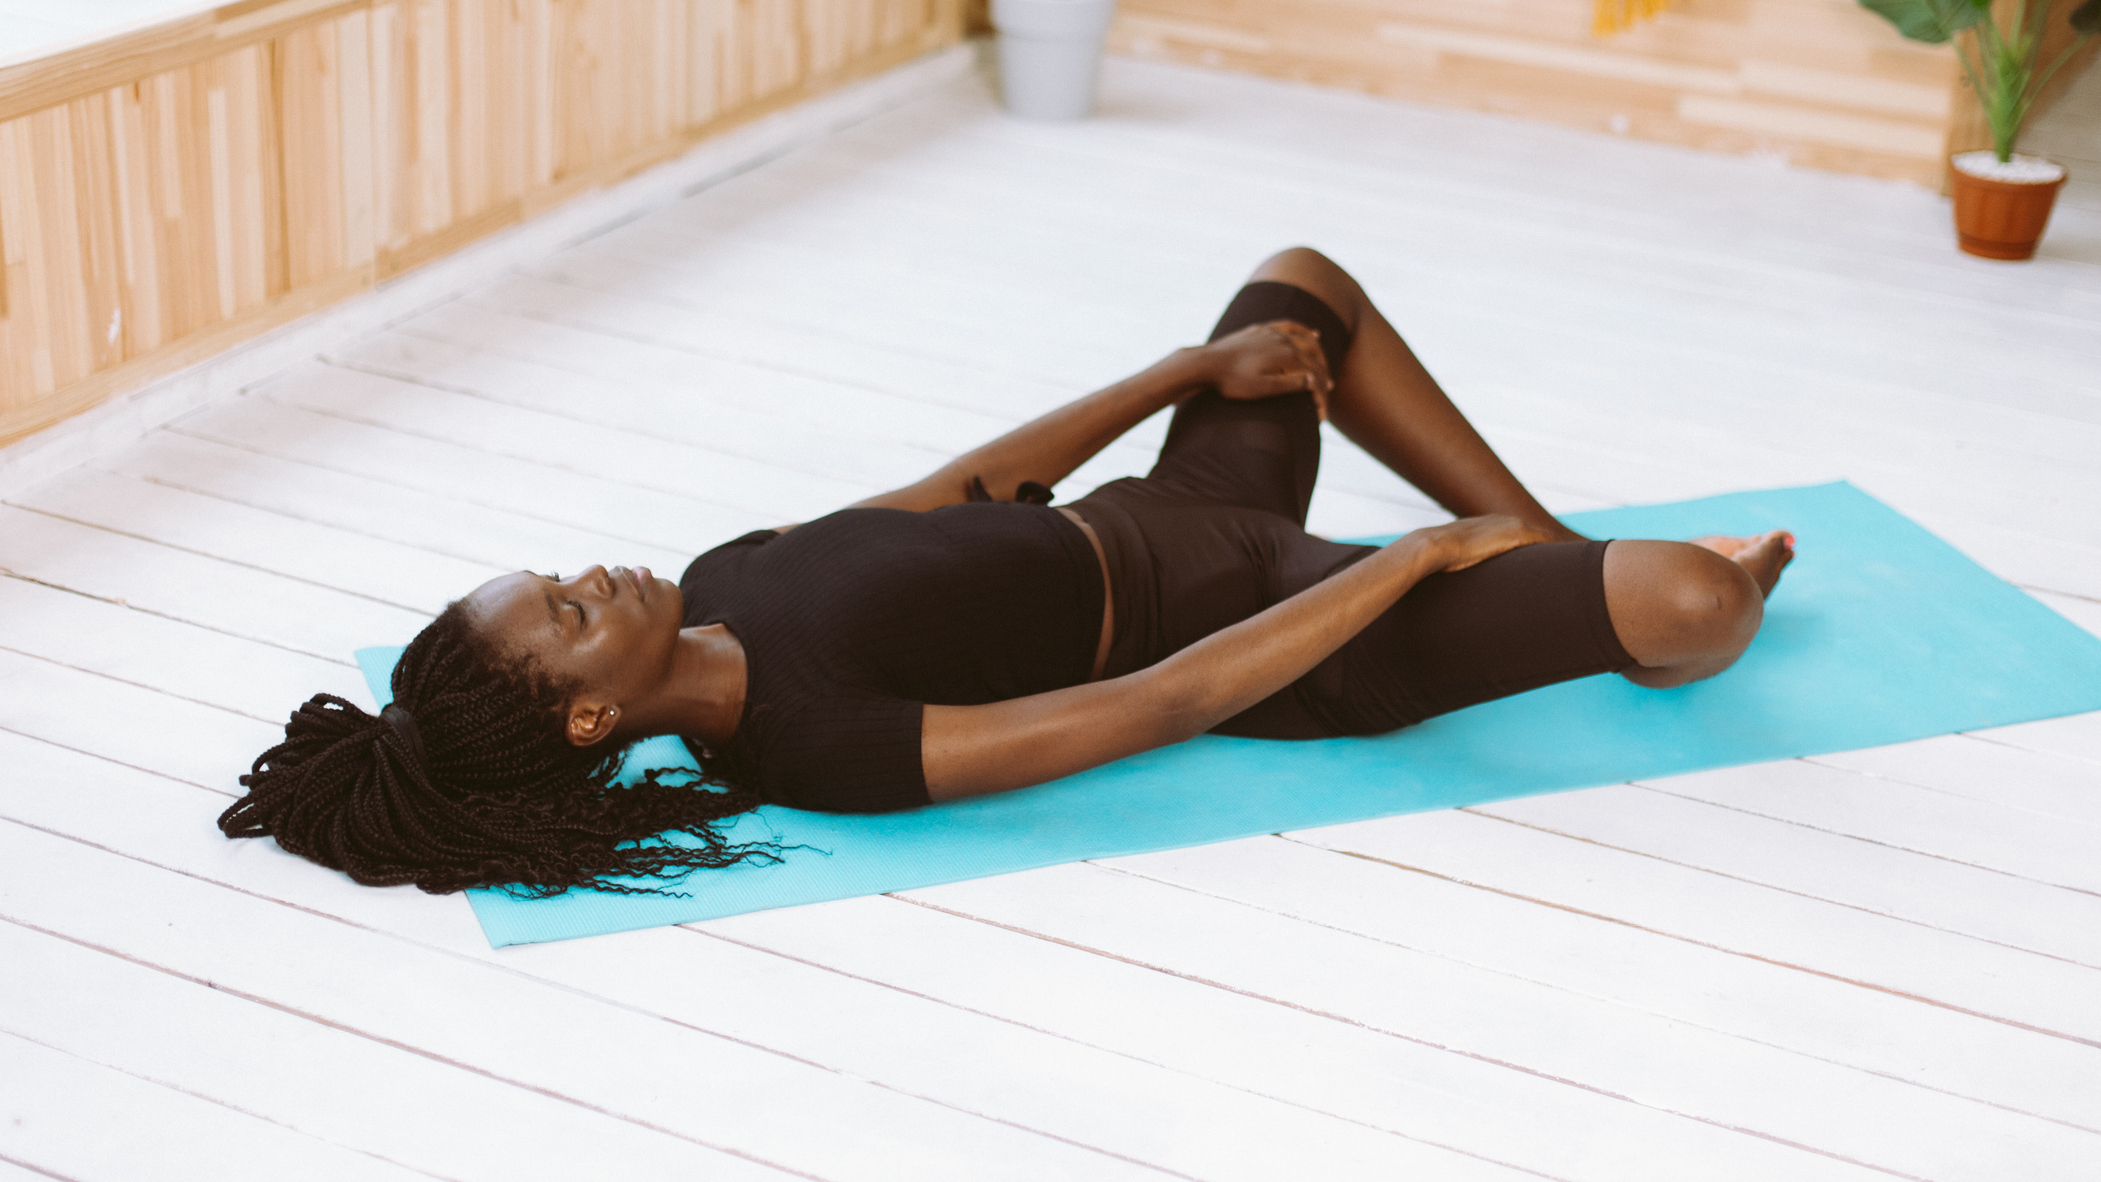
Time: 40-60sec
- Lie on your back with your knees bent, feet flat on the mat and your arms by your sides.
- Bring the bottoms of your feet together and let your knees fall open.
- Maintain a neutral and relaxed spine when performing this exercise. Avoid arching your lower back as you lower your knees toward the mat.
2. Figure 4 stretch
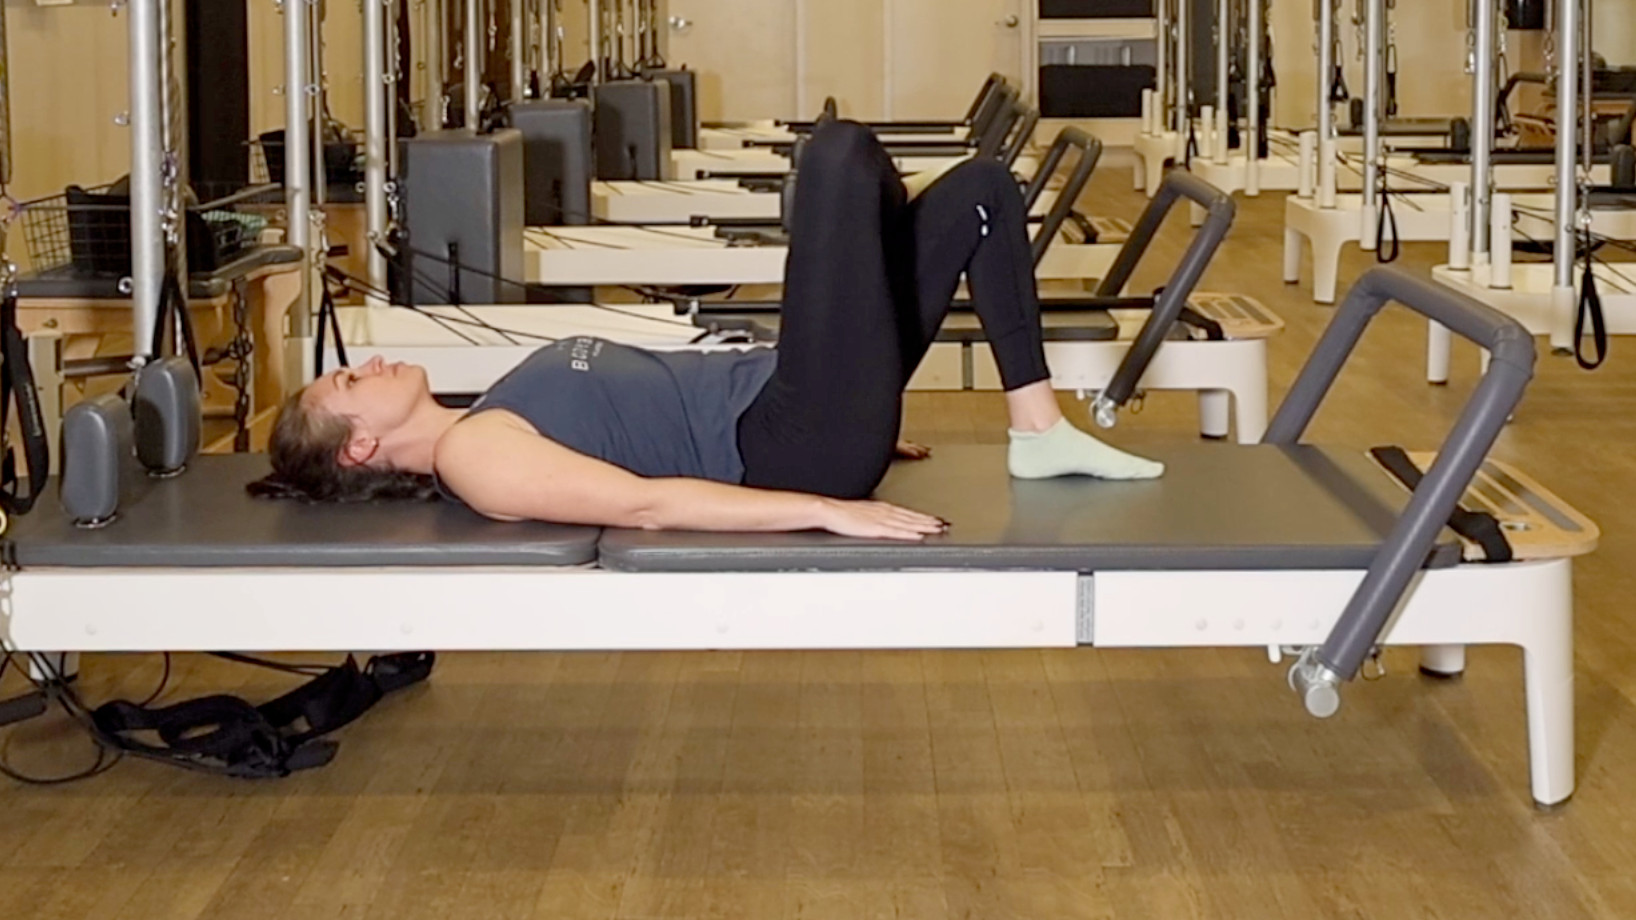
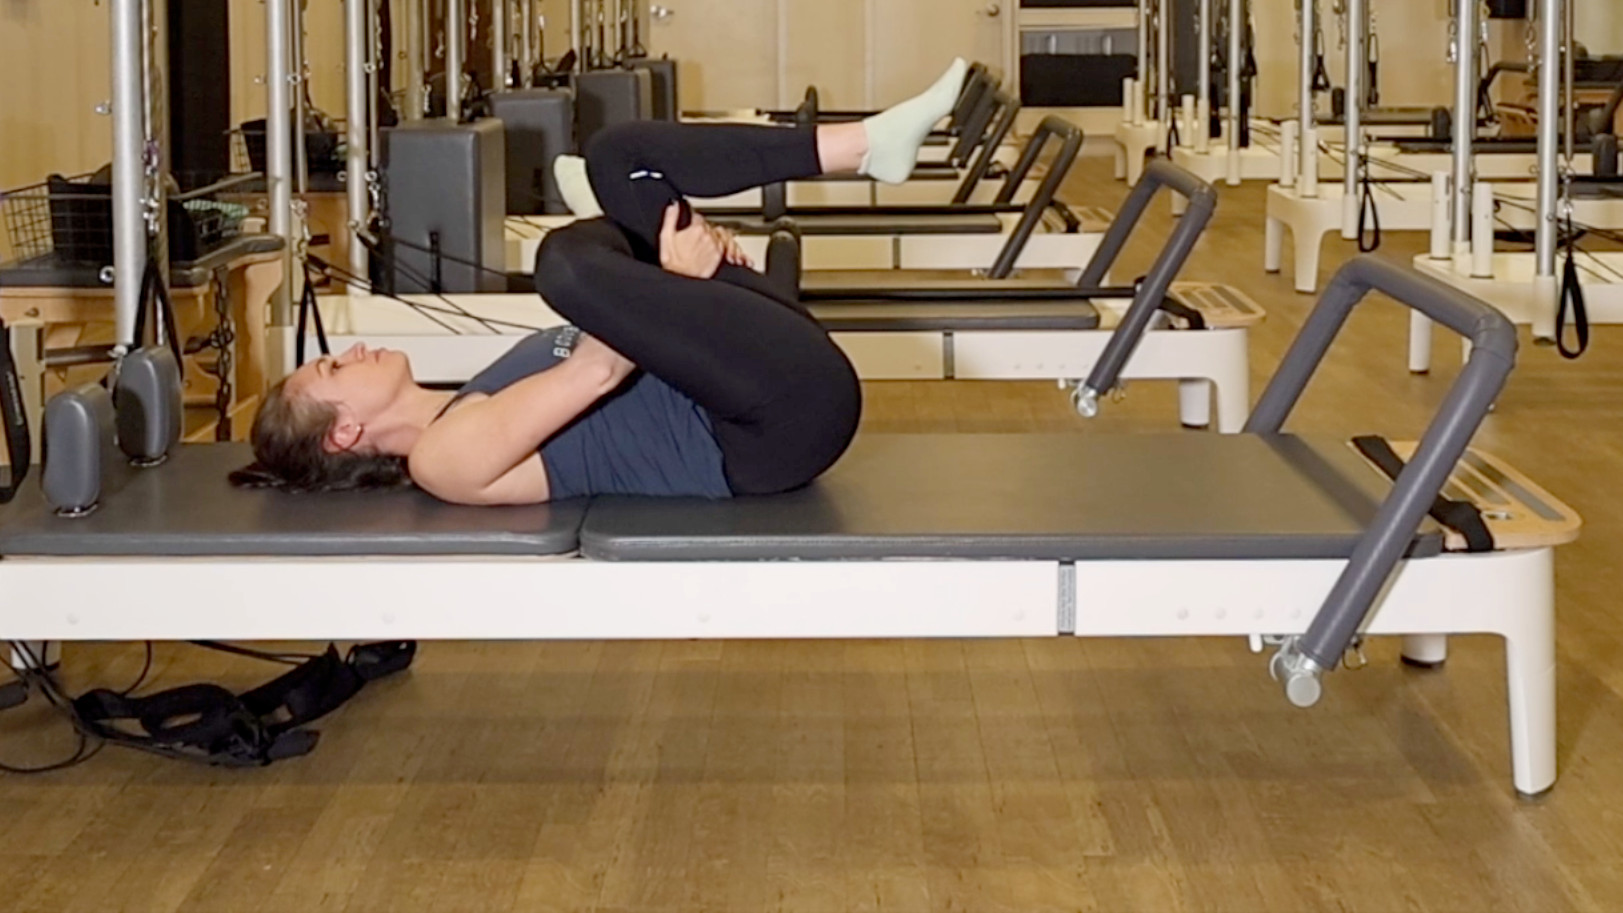
Time: 40-60sec
- Lie on your back with your knees bent and feet on the mat.
- Place your right ankle just above your left knee.
- Maintaining a neutral and relaxed spine with your hips anchored to the mat, place your hands behind your left thigh and pull it gently towards your chest.
3. Runner’s lunge
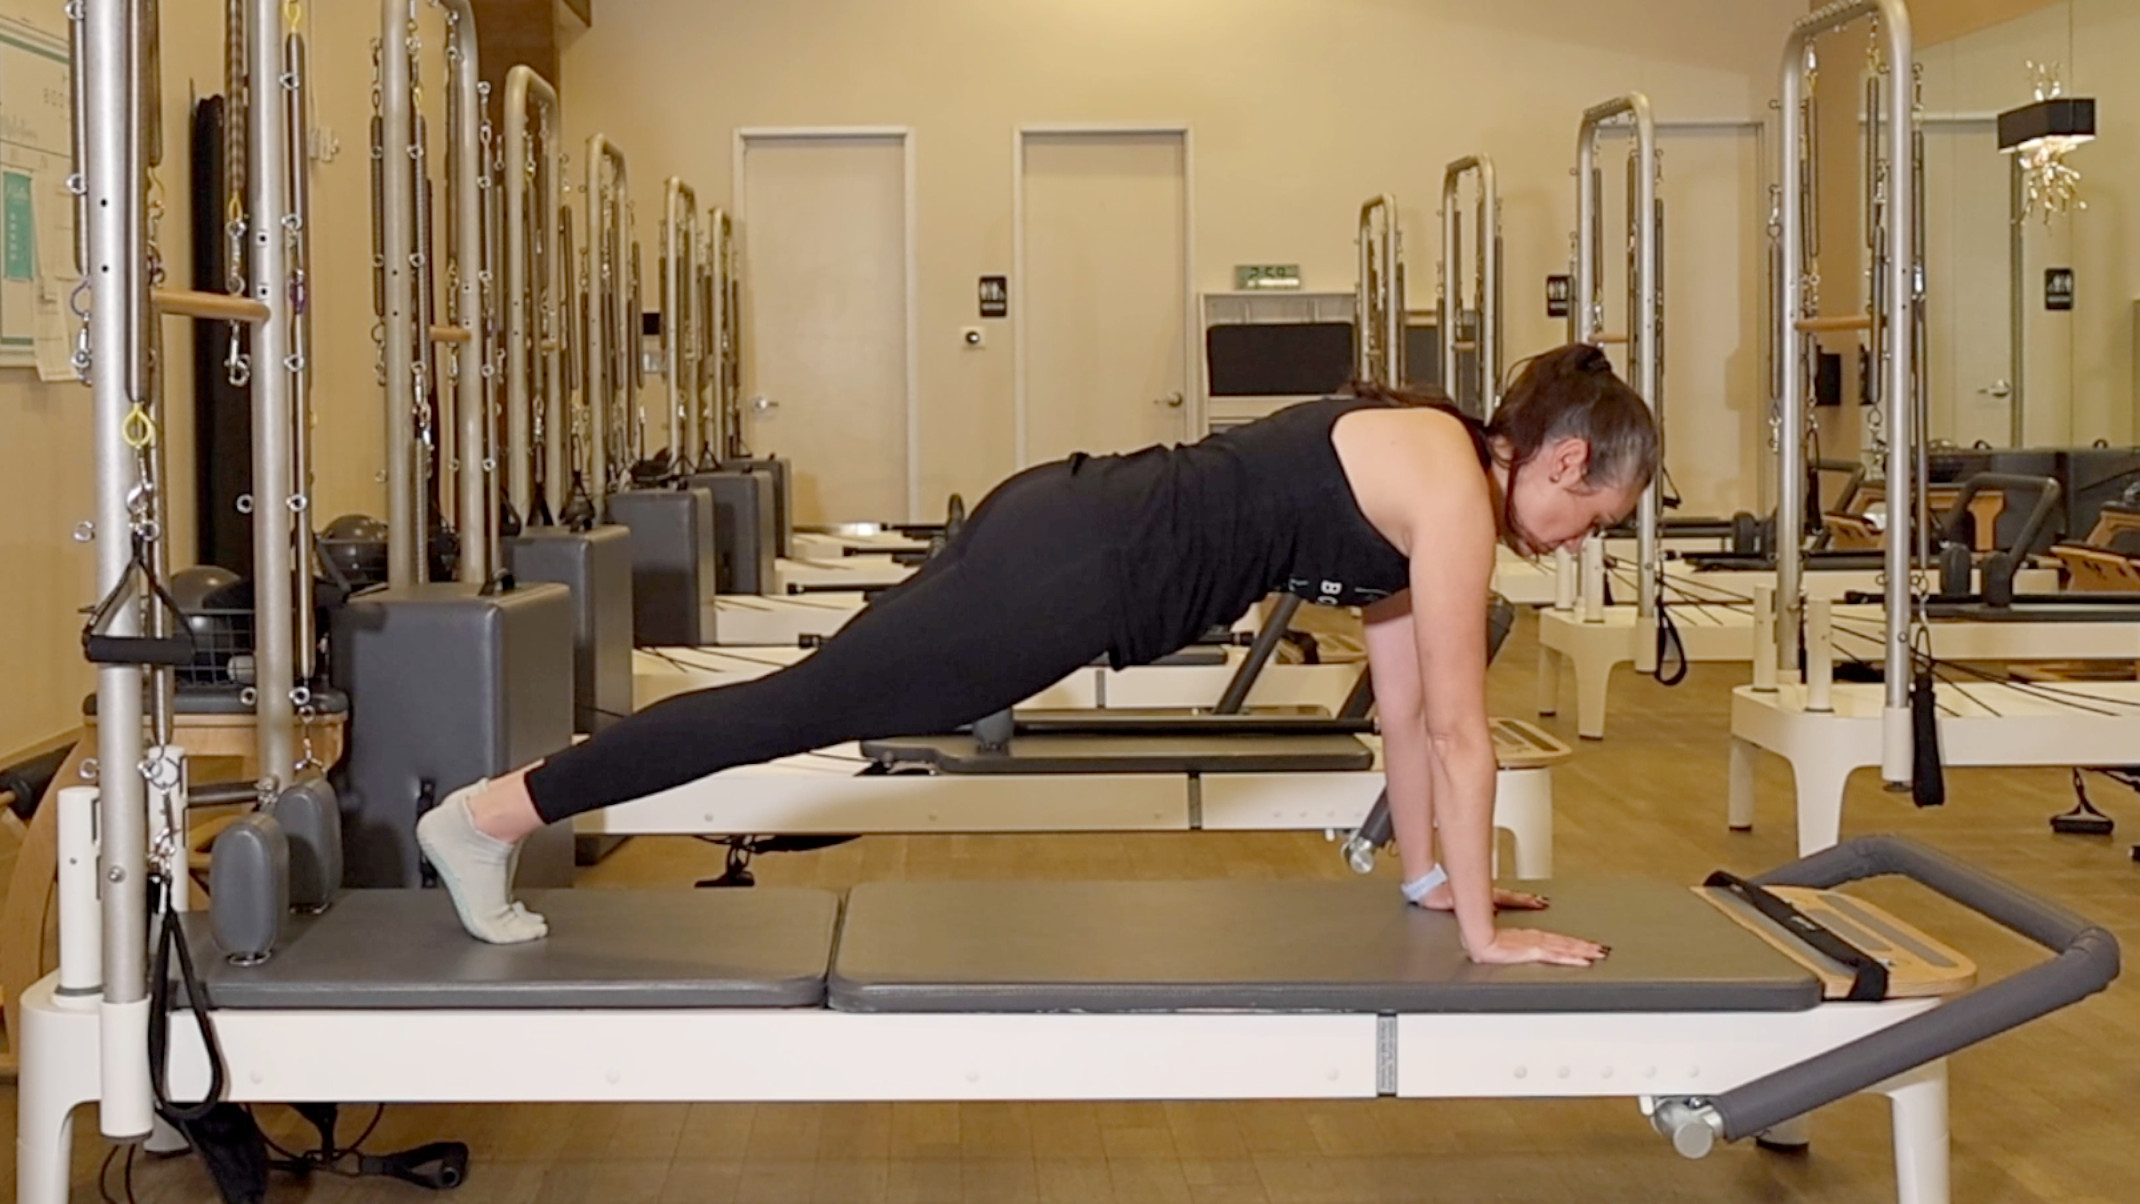
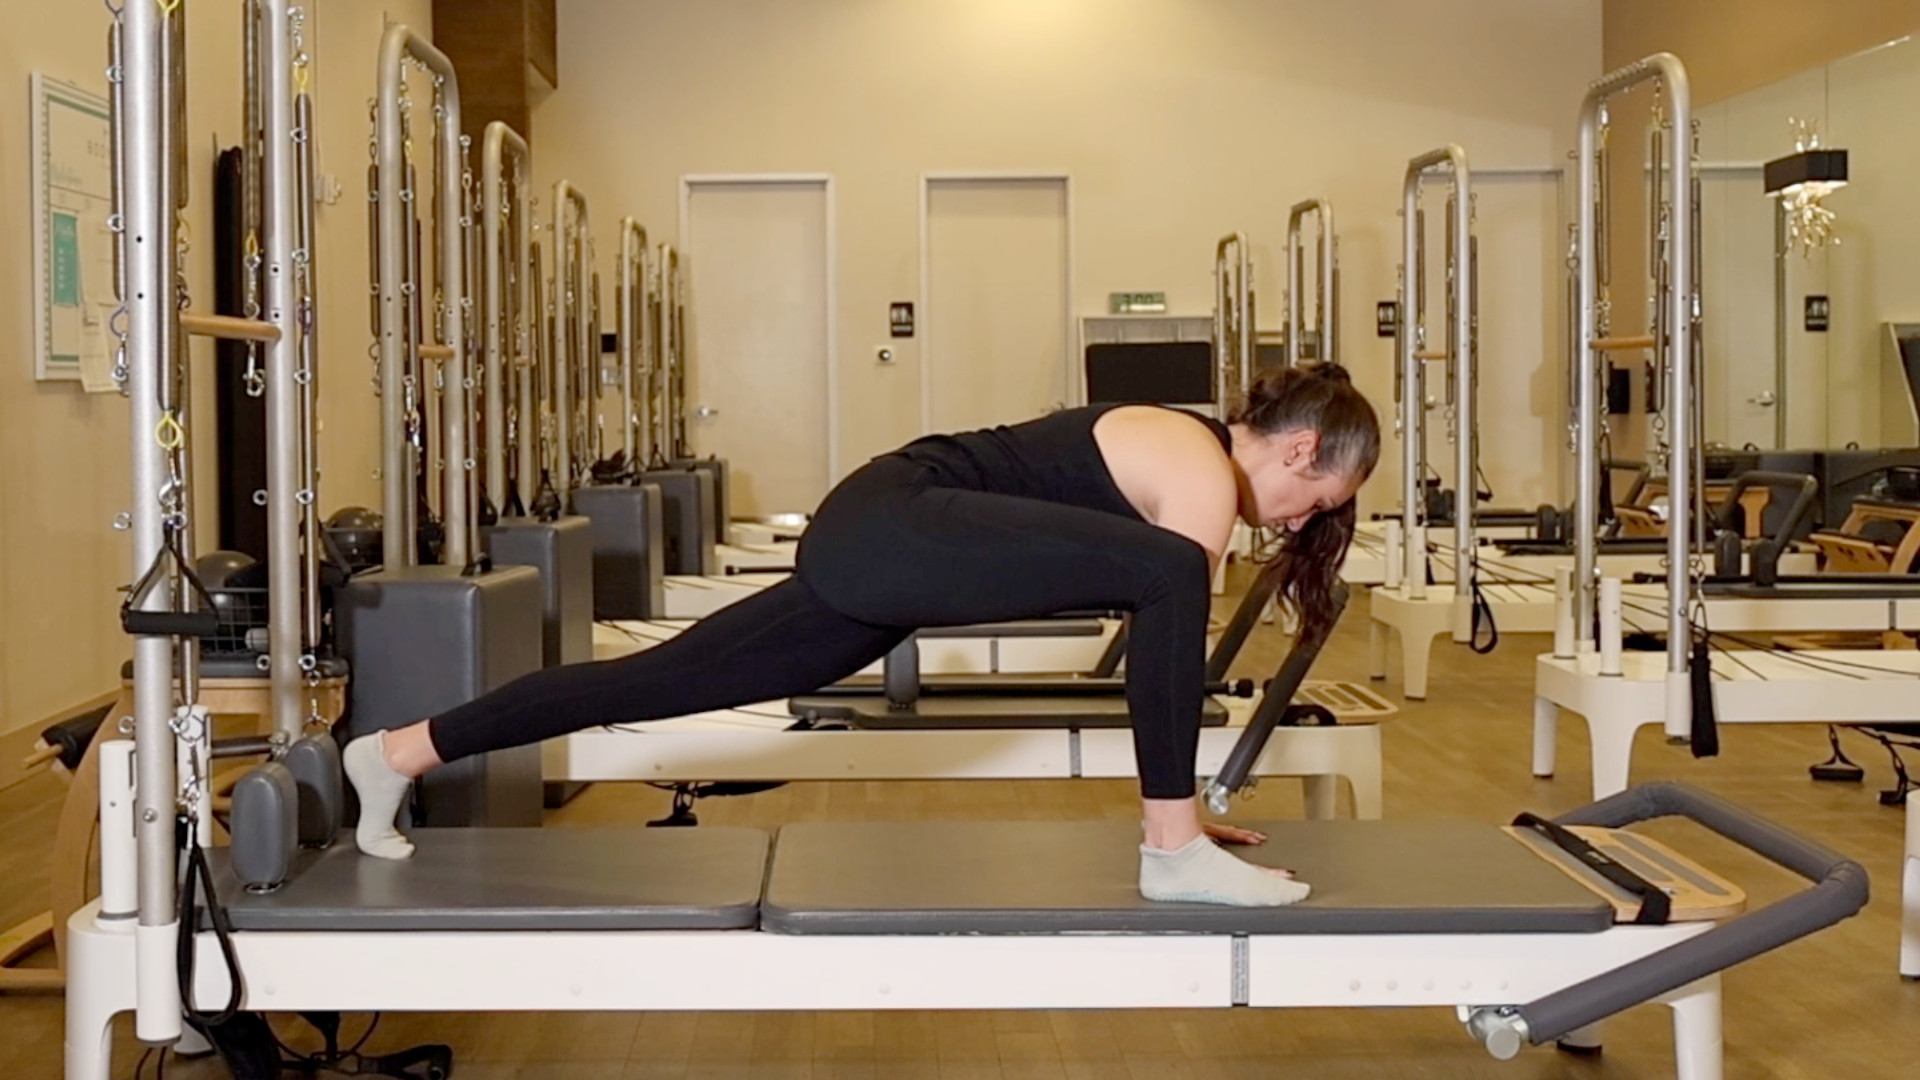
Reps: 8-10 each side
- Begin in a plank position on your hands and toes. Your shoulders should be over your wrists and your arms extended, your core should be engaged and your body should be in a straight line from head to heels.
- Step your left foot forward, placing it beside your left hand.
- Lift your torso to feel a stretch in your hip flexor. Lengthen your spine and engage your glutes to support your lower back.
- Reverse the movements with control to the start.
- Repeat on the other side. Continue alternating sides with each rep.
- Once you have mastered the standard stretch, you can add a twist, reaching the same arm as the front leg up, twisting through the upper body.
4. Mermaid stretch
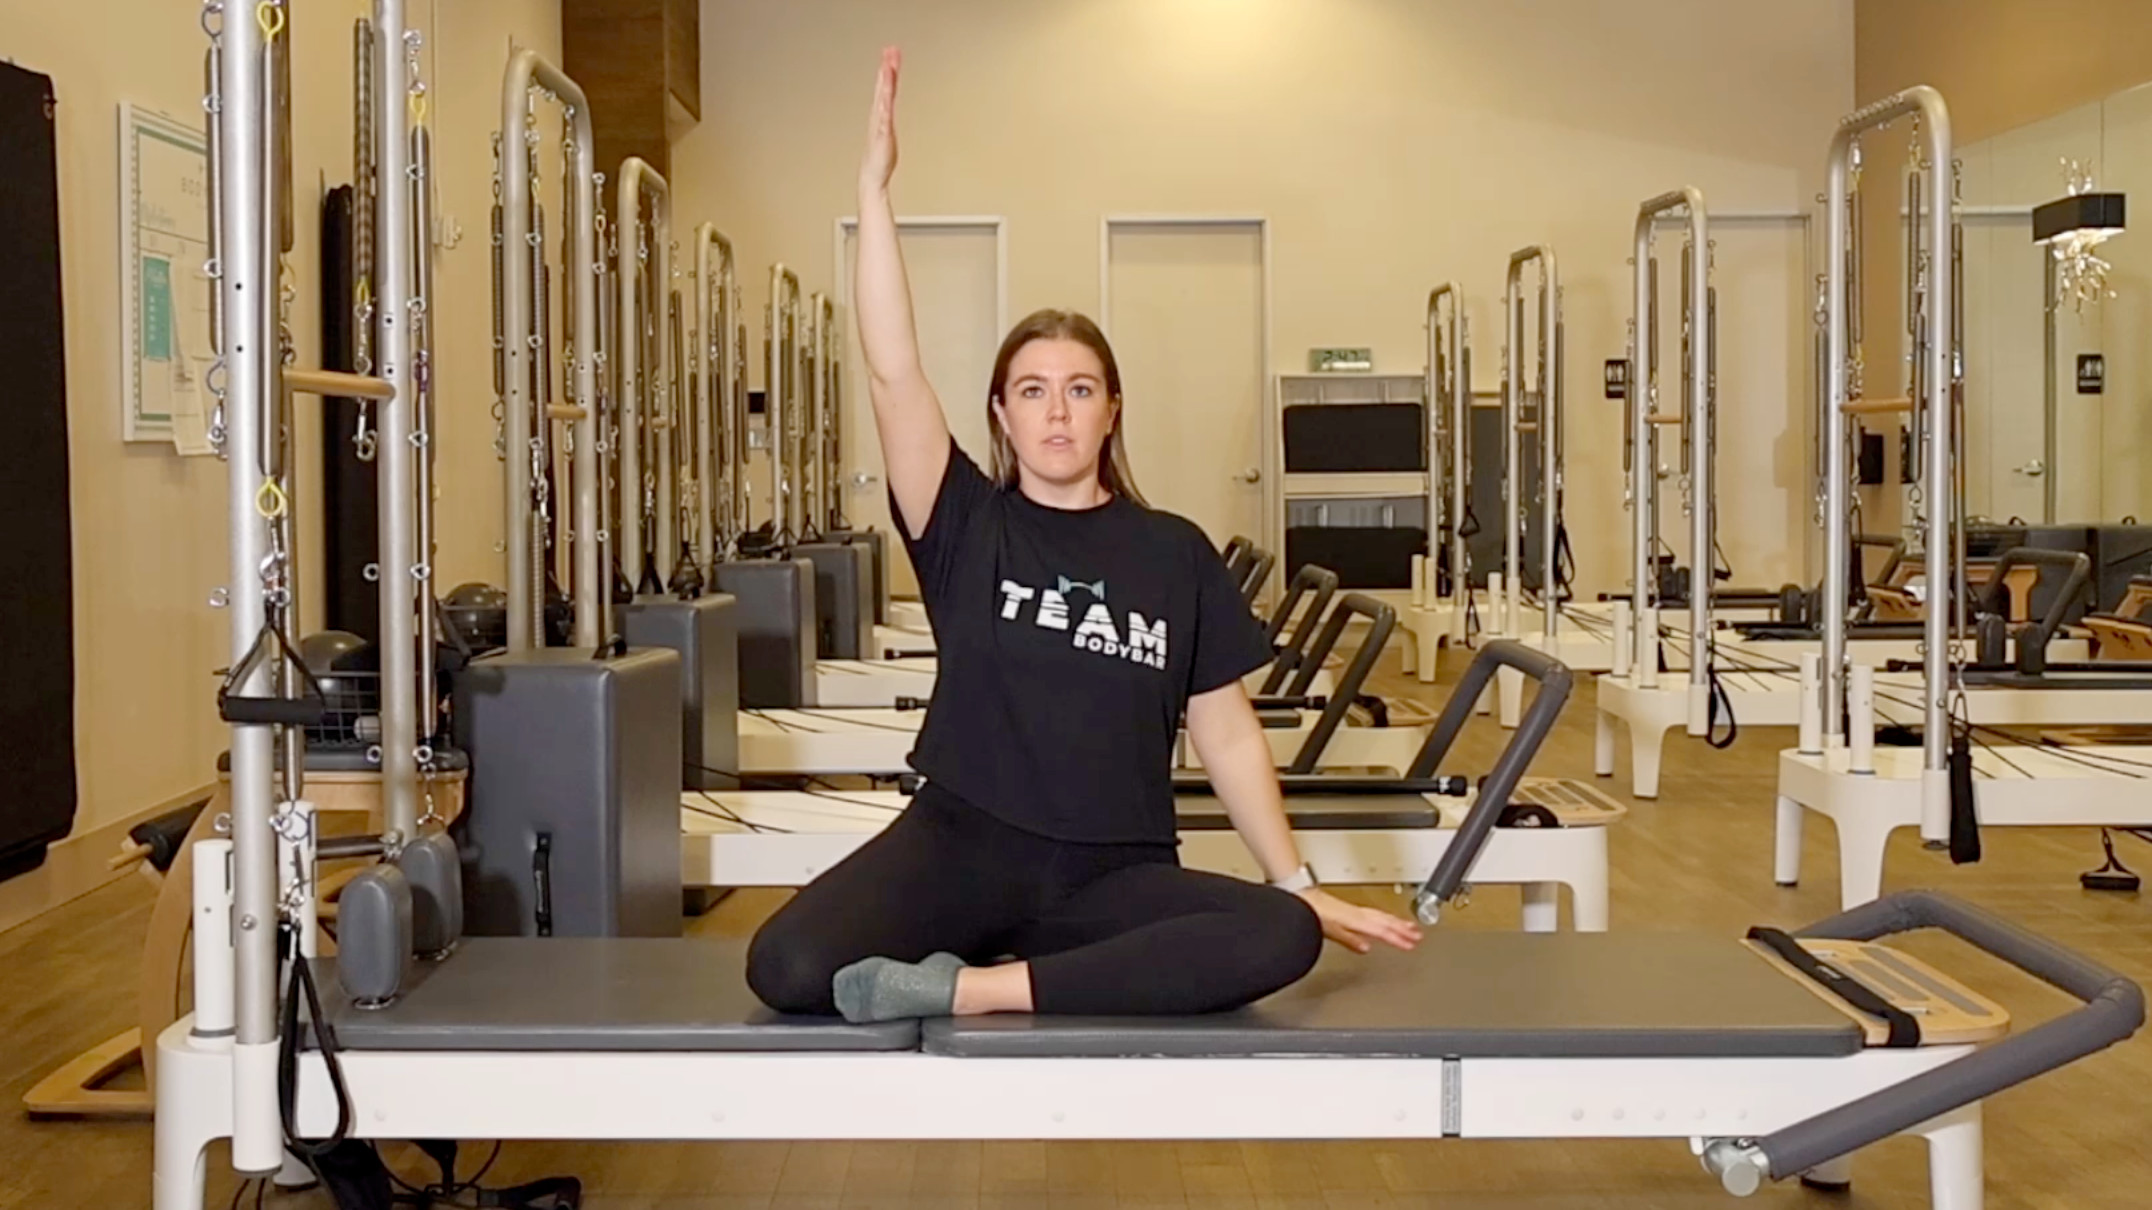
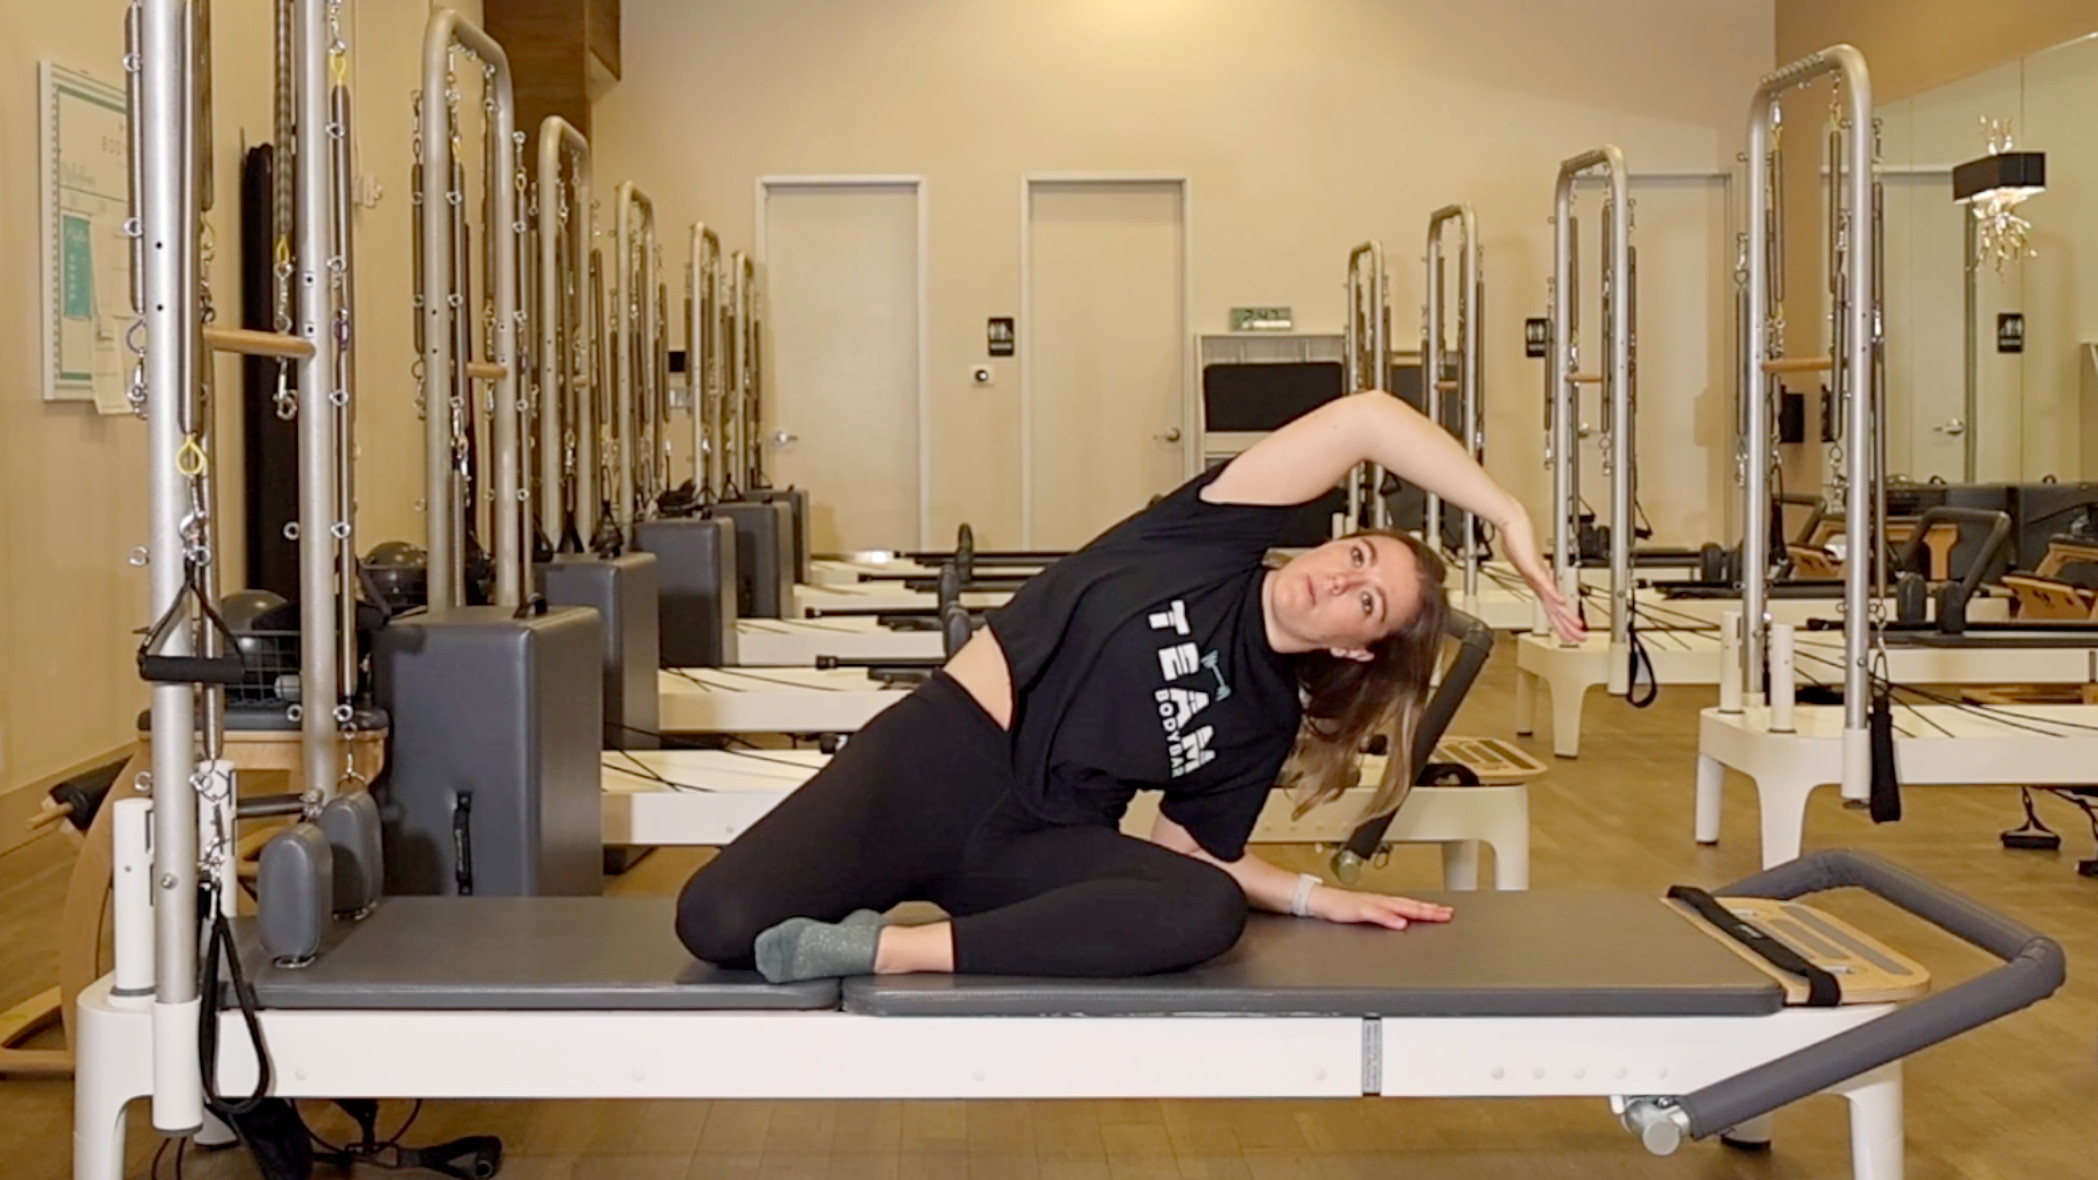
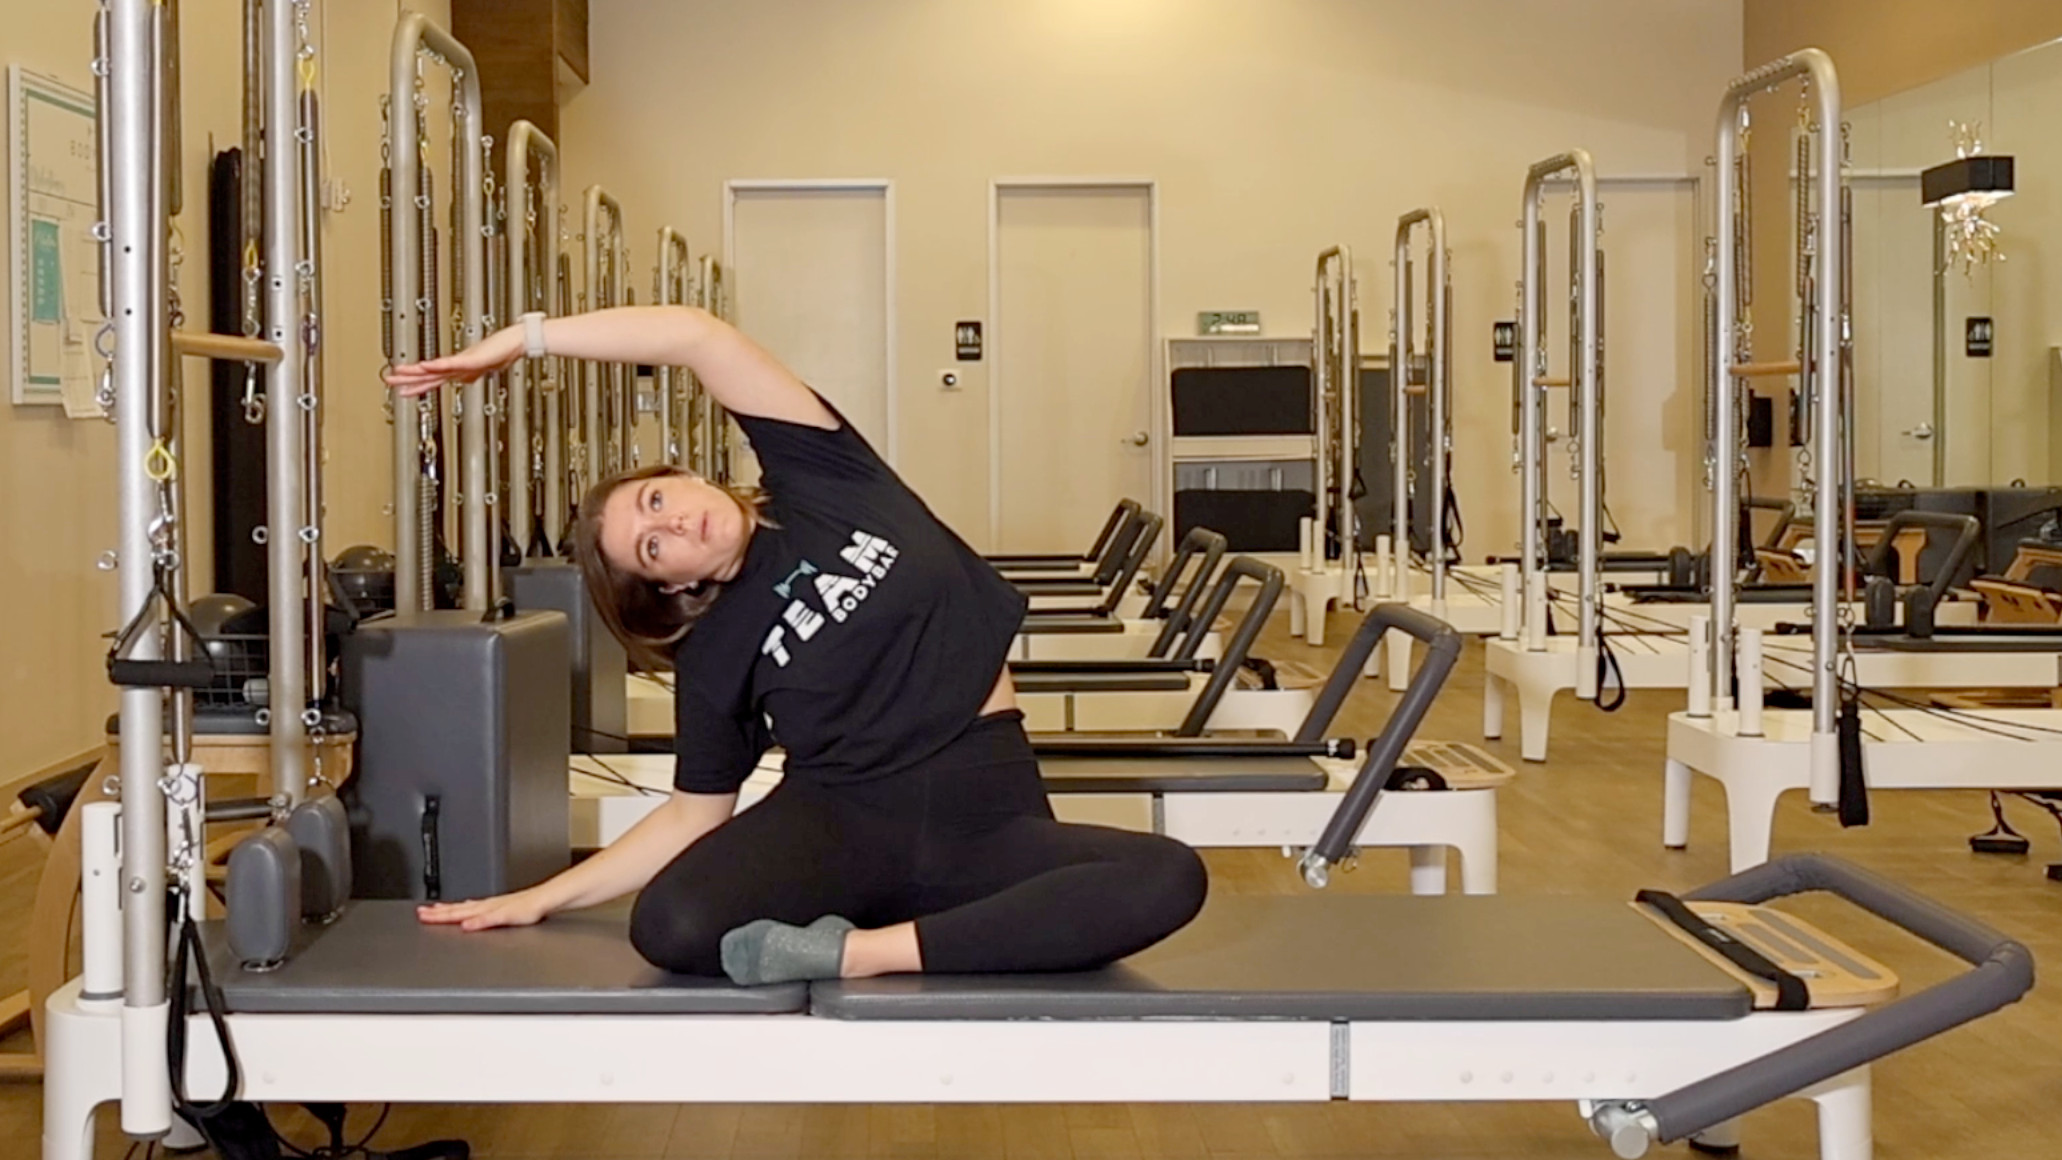
Reps: 8-10 each side
- Sit with one leg in front of you and one leg out to the side, with both knees bent to 90°, and your hands on the mat in line with your hips. (If this position is challenging for you, omit the stretch and simply hold this position for 40-60 seconds.)
- Anchor your hips to the mat, and square your hips and shoulders.
- Exhale as you reach your left arm up and over to the right, bending your torso to the right.
- Return to the center and inhale, then repeat on the other side, alternating sides with each rep and connecting the movement to your inhales and exhales.
- Once you’ve completed your reps, switch the position of your legs and repeat.
5. Happy baby
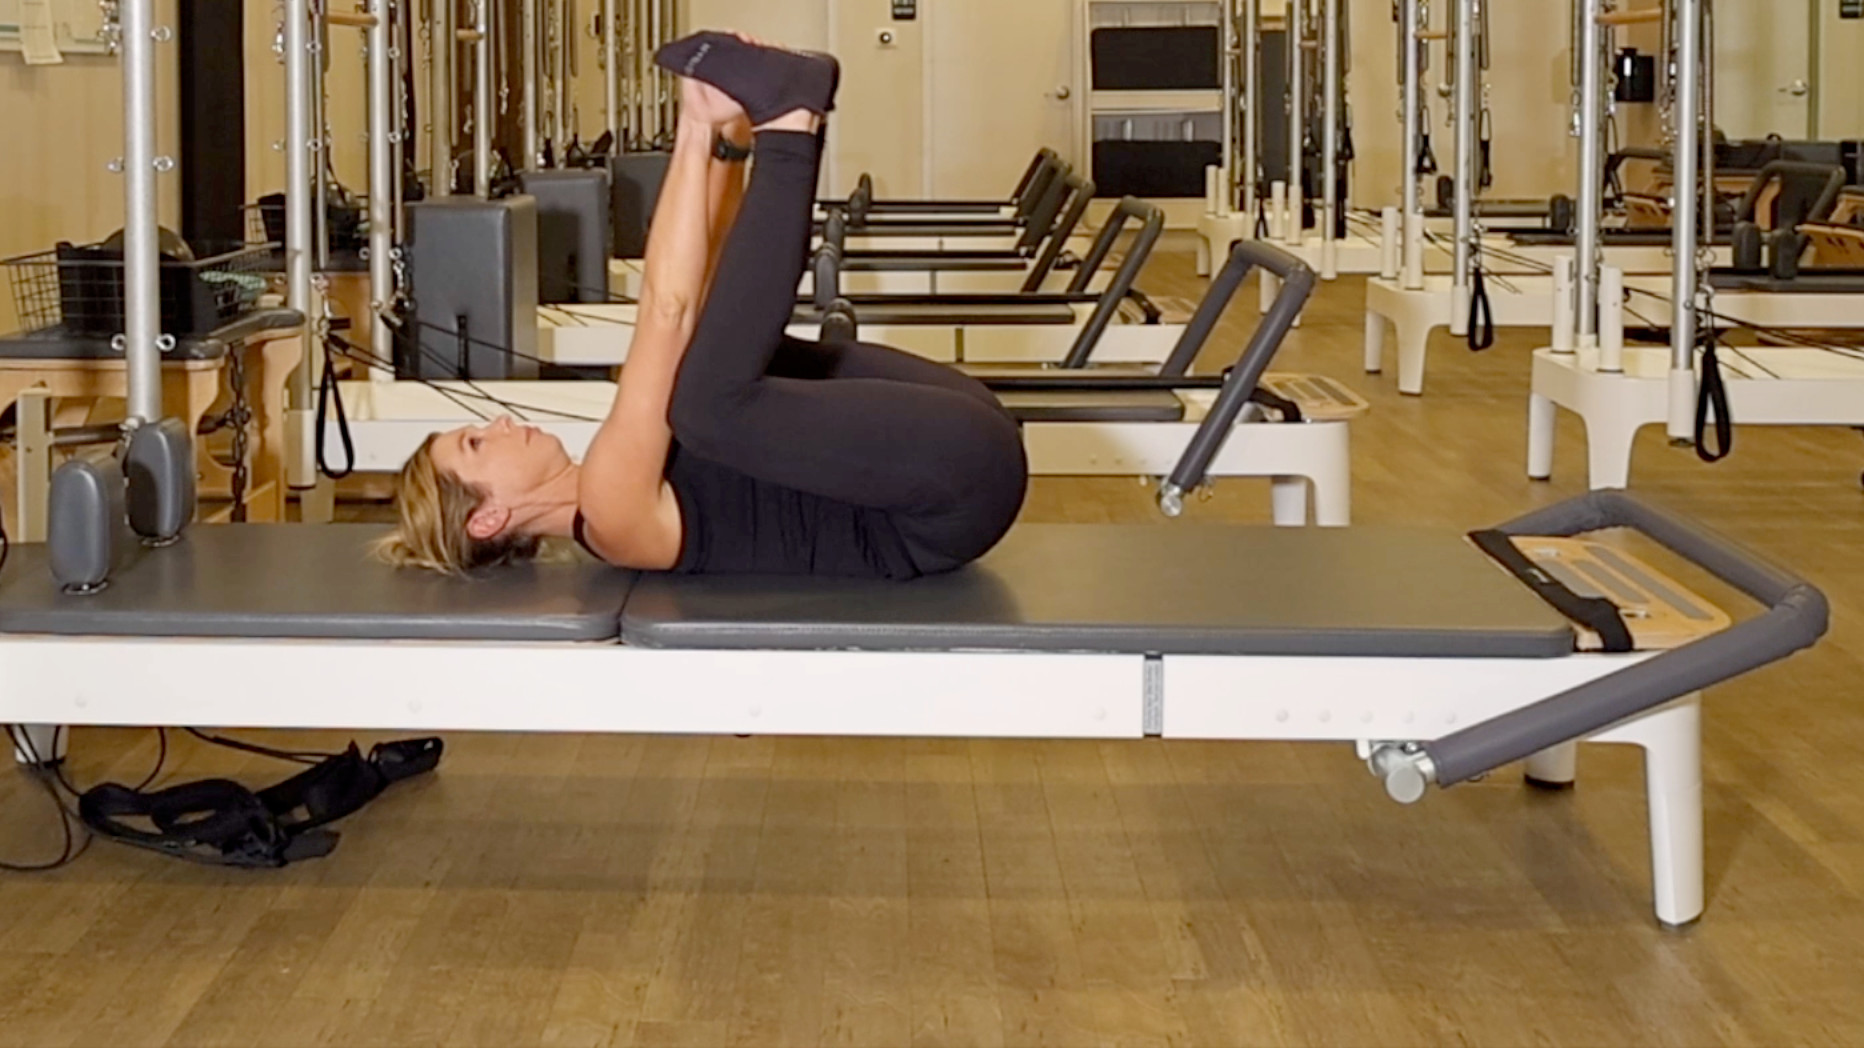
Time: 40-60sec
- Lay on your back with your knees bent and your feet on the mat.
- Maintaining a neutral and relaxed spine, lift your legs so the soles of your feet face up.
- Place your hands on the soles of your feet and draw your knees toward the mat, stretching your inner thighs and hips.
- Take deep breaths as you allow your knees to open wide.
- If it feels good, try gently rocking your hips and feet from side to side.

Jill Drummond is a NASM-certified Pilates instructor and personal trainer. She is also vice president of fitness at BODYBAR Pilates, after working as its director of programming and education.

Lou Mudge is a Health Writer at Future Plc, working across Fit&Well and Coach. She previously worked for Live Science, and regularly writes for Space.com and Pet's Radar. Based in Bath, UK, she has a passion for food, nutrition and health and is eager to demystify diet culture in order to make health and fitness accessible to everybody.
Multiple diagnoses in her early twenties sparked an interest in the gut-brain axis and the impact that diet and exercise can have on both physical and mental health. She was put on the FODMAP elimination diet during this time and learned to adapt recipes to fit these parameters, while retaining core flavors and textures, and now enjoys cooking for gut health.
You must confirm your public display name before commenting
Please logout and then login again, you will then be prompted to enter your display name.
