Start your week with achievable workout ideas, health tips and wellbeing advice in your inbox.
You are now subscribed
Your newsletter sign-up was successful
The bodyweight squat is a phenomenal exercise for developing lower-body strength and improving full-body mobility. It also mimics the movement of sitting down and standing up which is why it appears in every list of the best exercises for longevity.
The problem is, it's rarely done well. All too often, bad habits creep in, resulting in common squat mistakes like dropping your chest, allowing your knees to cave in or your spine to round. Fortunately, fitness expert Gustavo Vaz Tostes, also known as trainer Gus at digital fitness platform FIIT, has a simple solution.
The wall-facing squat test, a drill that looks simple, yet is anything but.
FIIT recently shared a video tutorial of Vaz Tostes performing this full-body mobility challenge, and we followed up with a few questions to better help us—and you—get the most from this drill. Master it and it'll take your lower-body strength game to new heights.
What is the wall-facing squat challenge?
Vaz Tostes tells Fit&Well that the wall-facing squat challenge is for anyone. "Even the most advanced athlete will learn something from this test," he says. "Yes, it's a bit of fun, but it's also a very famous squat drill to refine your technique."
It'll boost your mobility and force you to recruit the right muscles as you sink to the floor and drive back to stand. It'll also teach your brain the mechanics of good squatting technique so it becomes second nature.
"A common issue with the squat is people have the mobility to do it, but they don't know how to engage the right muscles in the right way to do it well," says Vaz Tostes. The result is they drop their chest—which he calls a "lazy squat"—or their knees collapse in or their pelvis "bites" at the bottom, putting strain on the lower back.
Start your week with achievable workout ideas, health tips and wellbeing advice in your inbox.
The simple remedy is to squat facing a wall. "Having the wall right in front of you means there's no way you can drop your chest," says Vaz Tostes. "There's no way to push your knees forward, which is another common mistake."
The wall forces your body to stay upright, to initiate the move by sitting your bum back and pushing your knees out to better recruit your glute muscles. "Not only will it make your squat look better, it will make it stronger too because you're engaging the right muscles," says Vaz Tostes.
How to do the wall-facing squat test
A post shared by Fitness App (@fiit)
A photo posted by on
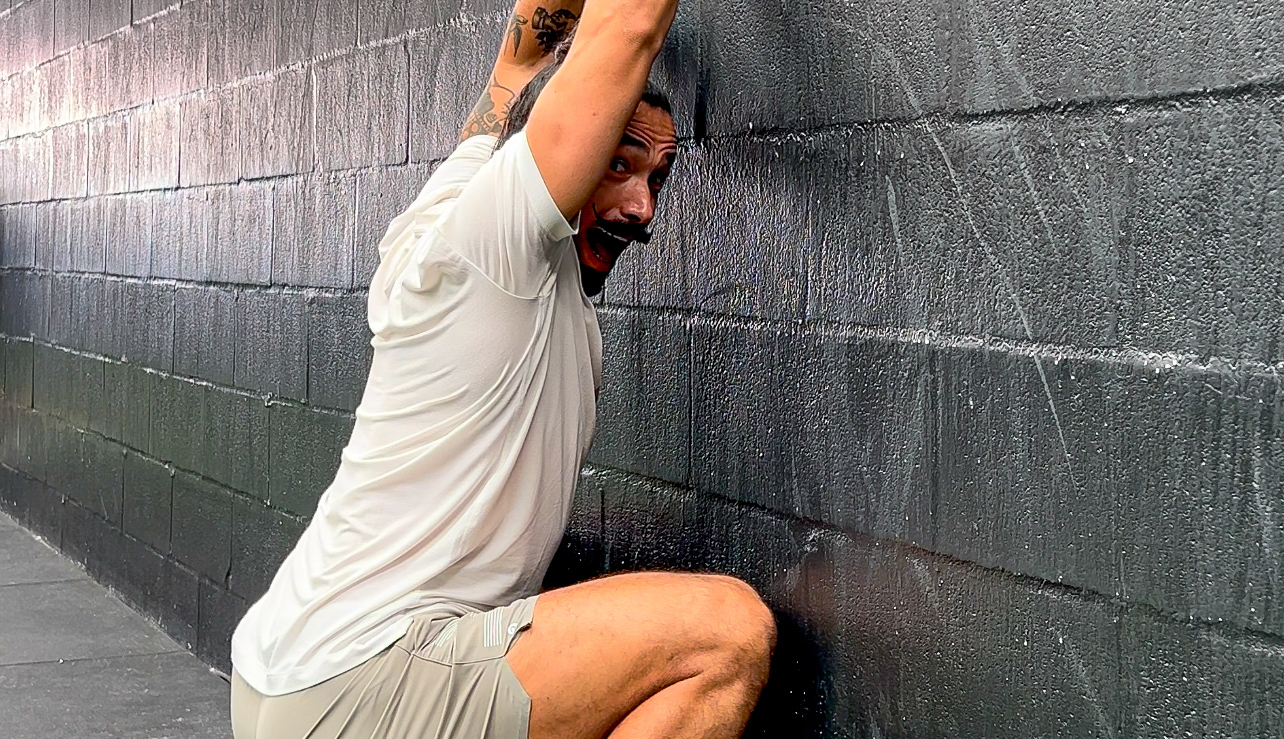
In the video, Vaz Tostes can be seen performing a series of wall-facing squats, inching his feet closer to the wall after each one until a final clip shows him sinking into a deep squat with his toes in contact with the wall, weight in his heels and hips below knees.
You should build up to the test in the same way, too. Here's how to perform the full test.
- Stand facing a wall with feet hip-width apart, toes slightly pointing out.
- Place your thumbs and index fingers together, extend your arms overhead and place your hands on the wall. Keep your hands in contact with the wall throughout.
- Position your feet so the tip of your shoe is in contact with the wall.
- From here, keep your knees wide and sit back into a squat, keeping your knees wide and weight in your heels, pressing your hands into the wall to keep your chest facing forward.
- Lower until your hips drop below your knees. Pause for a second, then drive up to stand, again keeping your knees wide apart.
If you struggle to maintain contact with the wall with either your hands or feet, can't sink low enough or lose your balance and end up flat on your backside, then it's a fail. Don't beat yourself up if you don't pass, we failed countless times, too. And there's a straightforward way to improve.
How to improve
Move your feet away from the wall until you find the sweet spot where you can perform the wall-facing squat properly—just. "Find a point where it gets really challenging, then do five sets of three reps, holding the bottom position for 10-15 seconds each time," says Vaz Tostes.
Your body will develop the mobility required for the drill while doing the movement.
"By spending time in this position, your body will remember," says Vaz Tostes. "And that's the thing about movement. You have to repeat an exercise, doing it properly every time, until your brain forgets but your body remembers."

Sam Rider is an experienced health and fitness journalist, author and REPS Level 3 qualified personal trainer, and has covered—and coached in—the industry since 2011. You can usually find him field-testing gym gear, debunking the latest wellness trends or attempting to juggle parenting while training for an overly-ambitious fitness challenge.
