“You don’t need an hour, a gym membership or a complicated program”—a certified trainer shares the 21-minute routine that builds strength, balance and confidence
“The reason this routine works isn’t just the exercises—it’s that it’s doable,” says trainer Jill Jones


There are many benefits you’ll experience if you work out at home.
For instance, this sessions devised by certified trainer Jill Jones will help strengthen your bones and muscles, improve your balance and stability, and aid mobility and joint health.
But most importantly, according to the owner of Colosseum Gym in New Jersey and co-founder of online platform FitQuo, it will boost your confidence and independence as you age, something Jones believes is “worth more than any fitness metric”.

“When a new client walks through my door or logs into a session from their living room, the first thing I tell them is that you don’t need an hour, a gym membership or a complicated program,” she tells Fit&Well.
“The reason this routine works isn’t just the exercises—it’s that it’s doable.
“Consistency beats intensity every single time. People start nervous and intimidated and leave capable, confident and educated. That shift, the moment they realize what their body is still capable of, is exactly why I do this work.”
Jones' routine incorporates a four-minute warm-up, a 14-minute circuit and a three-minute cool-down, and can be completed entirely from your living room.
“All you need is a chair and a light pair of dumbbells. If you don’t have those, a water bottle or jar of peanut butter works just fine to get started with,” she says.
How to do the workout
To start, take four minutes to warm up.
“Never skip this,” warns Jones. “Your joints need time to say hello.”
Once warm, perform each exercise of the main circuit for 45 seconds, resting for 15 seconds between moves. Complete the full circuit twice with a 60-second rest between rounds.
Jones recommends wrapping the session up with a gentle cool-down.
“Most people go wrong by skipping this section, but it’s where the magic of mobility happens and where you can activate your nervous system to promote rest and recovery.”
Warm-up
1. Seated ankle circles
Time: 30sec each side
- From seated, raise one foot just off the floor and rotate your ankle in one direction for 15 seconds.
- Rotate in the opposite direction for another 15 seconds.
- Switch feet and repeat.
“Poor ankle mobility is one of the quietest contributors to falls, and this takes just 60 seconds to address,” says Jones.
2. Standing hip circles
Reps: 10 each direction
- Stand with your feet hip-width apart, resting your hands on the back of the chair for support if needed.
- Slowly circle your hips clockwise.
- Do all your reps in one direction, then repeat counterclockwise.
3. Chest opener
Reps: 10
- Stand with your feet hip-width apart.
- Reach both arms forward, then move them out to the sides and behind you.
- Join your fingers together behind you if your mobility allows.
- Move slowly and with control to help stretch your chest and mobilize your shoulders.
4. Marching in place
Time: 60sec
- Stand with your feet hip-width apart.
- Lift your right knee to hip height.
- Return to the start, then repeat on the other side.
- Continue, moving slowly and intentionally, alternating sides with each rep.
- Hold the back of a chair if needed.
“Marching in place nudges your heart rate up and primes your hips for what’s coming,” says Jones.
The workout
1. Bodyweight squat

Time: 45sec Rest: 15sec
- Stand with your feet hip-width apart with a chair behind you if needed.
- Push your hips back and bend your knees to lower until your thighs are as close to parallel with the floor as possible, aiming for a 90° bend in your knees.
- Press through your heels to stand back up.
“The chair is there as a safety net, not a crutch,” says Jones. “Trusting yourself to do this freestanding is half the work.
“We use this movement every single day, every time we sit down and stand up from the sofa, the car, even the toilet. The stronger you get here, the more independent you will feel everywhere else. Aim for 10-14 reps in 45 seconds.”
Make it harder: Hold a dumbbell or water bottle at your chest to add resistance as you get stronger.
2. Bent-over row
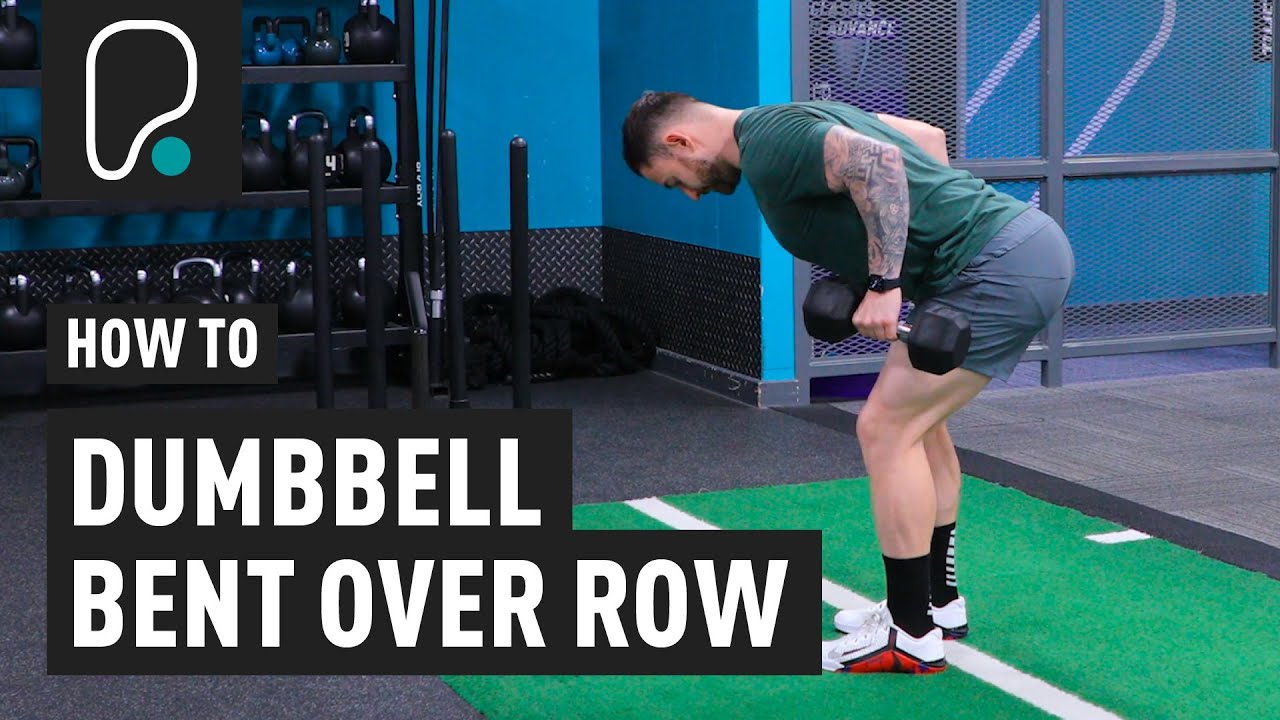
Time: 45sec Rest: 15sec
- Hold dumbbells or filled water bottles by your sides.
- Hinge forward from your hips, pushing your hips back and lowering your torso, keeping your back flat.
- Lift the weights to your hips.
- Squeeze your shoulder blades together at the top of the movement.
- Lower the dumbbells slowly.
“Years of sitting rounds [your back] forward,” says Jones. “This exercise fights back. It strengthens the upper back and spine and loads the bones in exactly the right places. Aim for 10-12 reps in 45 seconds.”
Make it harder: Loop a resistance band under both feet and the dumbbells. “It’s the same movement, just with added tension, so no need for heavier weights,” says Jones.
3. Single-leg balance hold

Time: 45sec Rest: 15sec
- Stand with your feet hip-width apart.
- Lift one foot, holding your arms out wide for balance.
- Hold this position for 20 seconds on each side.
“It sounds almost too simple—then clients try it and realize how much their body is actually working,” says Jones. “Every wobble you feel is your stabilizing muscles firing and getting stronger. This transfers directly to real life. Stepping off a curb, walking on uneven ground, getting in and out of the shower.”
Make it easier: Hold the back of a chair if needed and gradually work toward letting go. “Even holding with one finger counts as progress,” says Jones.
4. Single-leg Romanian deadlift tap
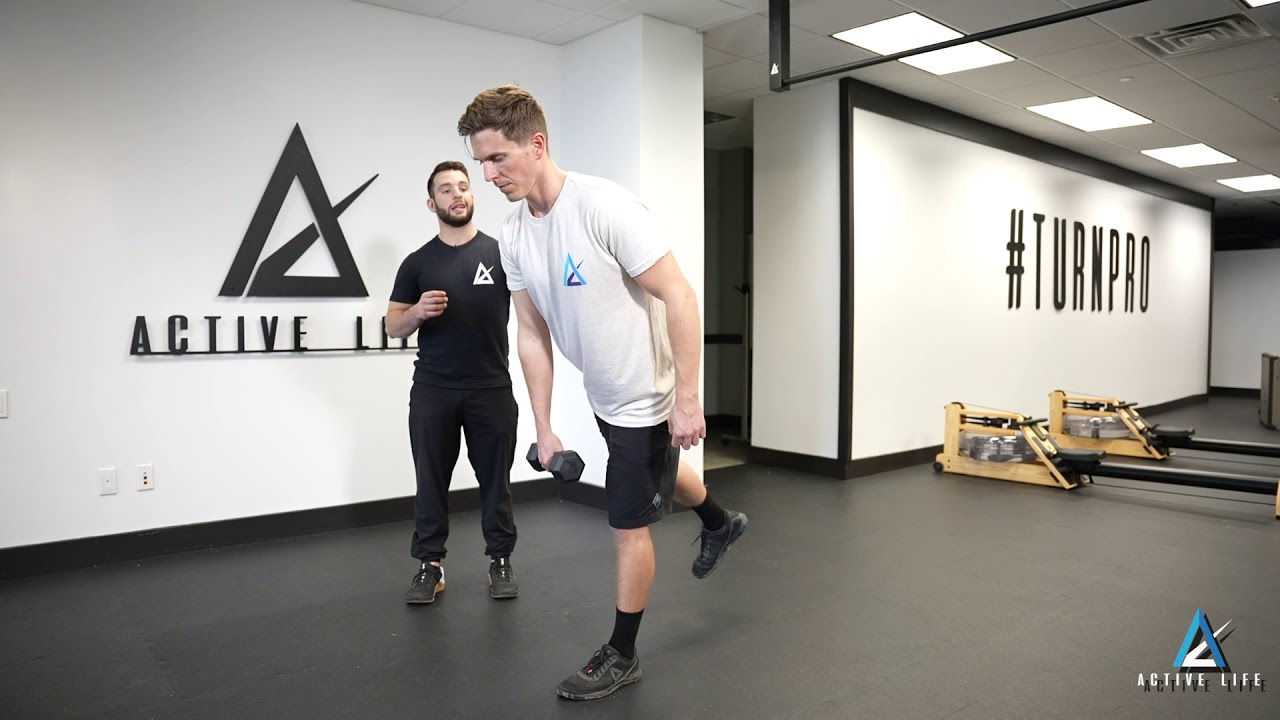
Time: 45sec Rest: 15sec
- Stand with your feet hip-width apart, with a slight bend in your knees.
- Hold a light dumbbell (or filled water bottle) in your right hand.
- Hinge forward from your hips, not your waist, lifting your left leg behind you and slowly lowering the dumbbell, keeping your back flat and hips square to the floor.
- Tap the dumbbell on the floor, or go as low as possible, then drive your hips forward to return to standing upright.
“The object gives you something to focus on, which naturally steadies your balance and keeps the movement deliberate,” says Jones. “This is your body learning to catch itself before a stumble becomes a fall.”
Make it easier: “Not ready for the hinge yet? Go back to the single-leg balance hold above and build your confidence there first—there’s no rush,” says Jones.
5. Step-touch with arm reach
Time: 45sec Rest: 15sec
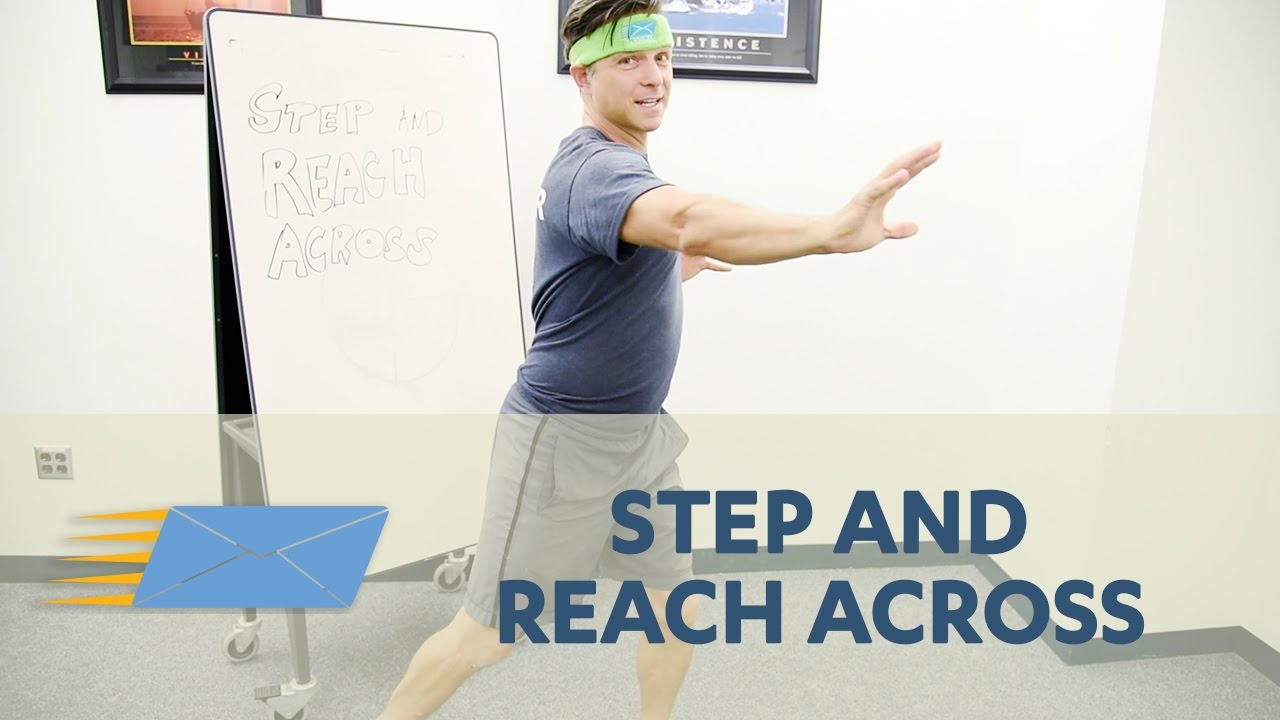
- Stand with your feet hip-width apart.
- Take a small step to the right with your right foot and reach across your body with your right arm.
- Return to the start, then repeat on the other side.
- Continue at pace, alternating sides with each rep.
“This drill is low impact, it gets the heart rate up gently, and the coordination element of arms and legs working together is genuinely good for both cardiovascular fitness and brain health,” says Jones. “This is your VO2 max work. It doesn't need to be fancy to be effective. My clients always end up smiling during this one.”
Make it harder: Add a knee raise at the end of each step. Lift the knee to hip height, hold for a beat, then step back out. For example, if stepping to your left, raise your right knee while reaching your left hand across your body, then return to the start and switch sides. “It adds a real balance challenge and nudges the intensity up a notch,” says Jones.
6. Glute bridge
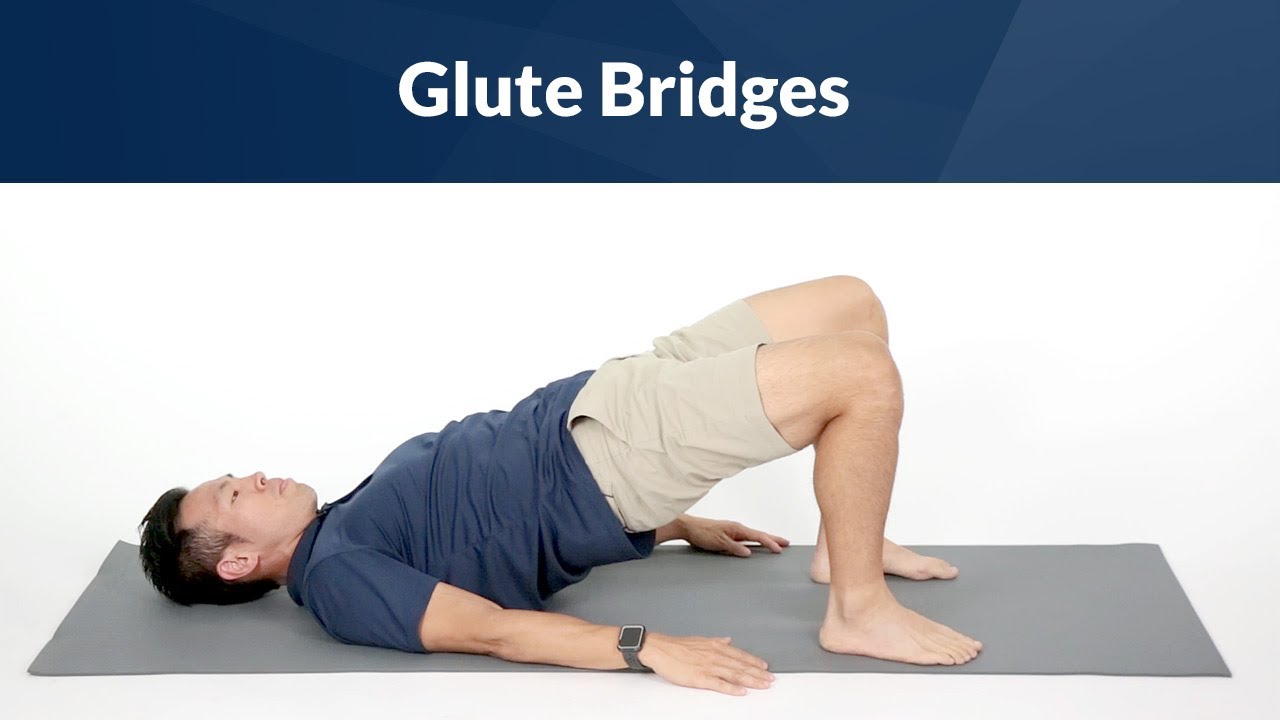
Time: 45sec Rest: 15sec
- Lie on your back with your knees bent and feet flat on the floor, hip-width apart.
- Press through your heels and lift your hips until your body forms a straight line from your shoulders to knees.
- Hold for a few seconds at the top of the movement, then lower slowly with control.
“Strong glutes protect your hips and lower back, two of the areas most vulnerable to injury as you age. This one is also quietly satisfying to master,” says Jones.
Make it harder: Loop a mini resistance band just above your knees for added glute activation, or place a dumbbell or heavy book across your hips before you lift.
“Clients who struggled with this in week one are often doing it with a band and added weight within a month,” says Jones.
7. Wall push-up
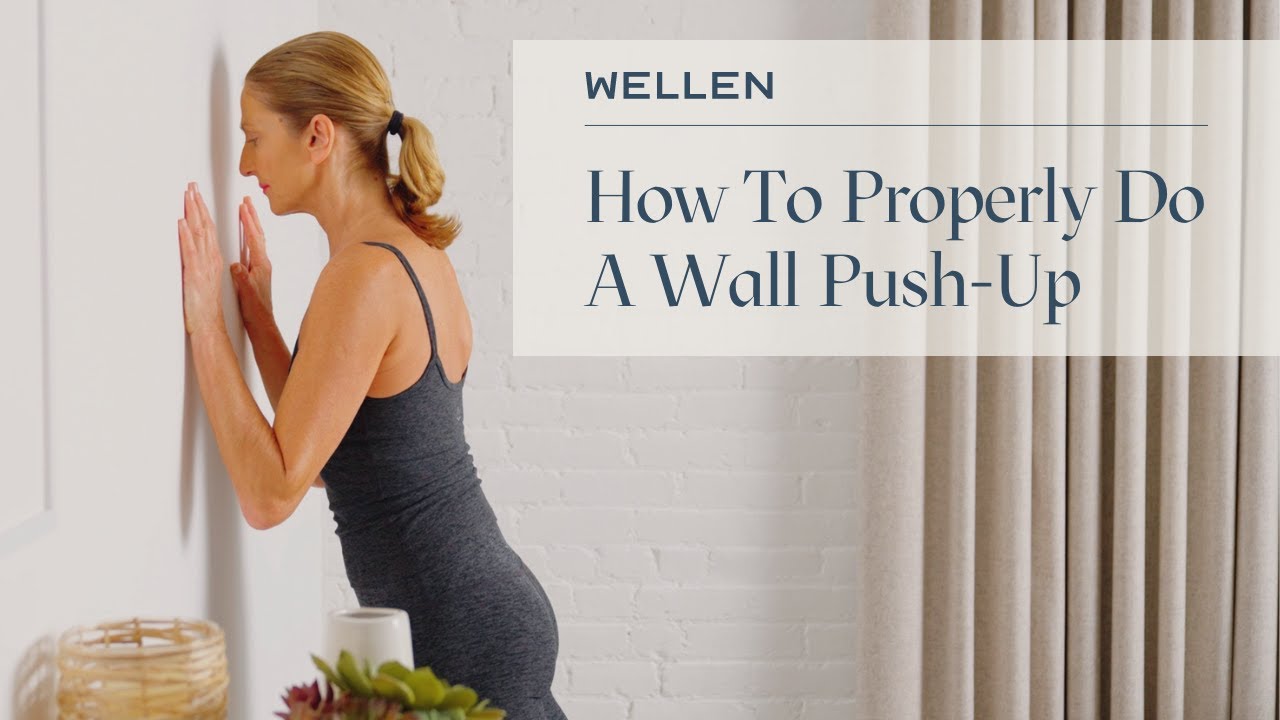
Time: 45sec Rest: 15sec
- Stand facing a wall with your feet hip-width apart, a little more than an arm’s length away—the further back you stand, the harder the exercise is.
- Place your hands on the wall slightly wider than shoulder-width apart at chest height.
- Keeping your body in a straight line from head to heels, bend your elbows and lower your chest slowly toward the wall.
- Push through your palms and extend your arms to press back to the start.
“Wall push-ups build upper body and chest strength in a completely joint-friendly way. Just be sure not to let your hips sag or your lower back to arch,” advises Jones.
Make it harder: "When wall push-ups feel easy, take it to the floor. The movement is identical. Your body will know exactly what to do," says Jones.
Cool-down
1. Standing quad stretch
Time: 30sec each side
- Stand with your feet hip-width apart.
- Bend your right knee and lift your right foot towards your butt, taking hold of your right ankle with your right hand.
- Hold the back of a chair with your opposite hand for support if needed.
- Push your hips forward to deepen the stretch down the front of your thighs.
2. Shoulder stretch
Time: 30sec each side
- Cross your right arm across your chest and hold your right elbow in your left hand.
- Gently pull your right arm towards you to feel a stretch in your shoulder.
- Keep your shoulders relaxed—avoid scrunching them up toward your ear.
- Breathe into the stretch for 30 seconds, then switch sides.
3. Slow neck roll
Time: 15sec each side
- From standing, tilt your head to bring one ear toward your shoulder.
- Pause for 15 seconds, then roll your chin slowly toward your chest and across to your other shoulder.
- Hold for 15 seconds.
“Take your time and never roll your head backward,” says Jones.
4. Standing roll-down
Time: 30sec
- Stand with your feet hip-width apart.
- Inhale, then as you exhale, tuck your chin to your chest and slowly roll down through your spine, one vertebra at a time.
- Let your arms hang heavy toward the floor.
- Relax at the bottom of this stretch for 20-30 seconds, then slowly roll back up the same way, stacking each vertebra until you are upright again.
“This is one of the best things you can do for spinal mobility,” says Jones. “But if you have osteoporosis or any spinal concerns, skip this one and hold a gentle seated forward lean for 30 seconds instead.”
5. Deep breathing
Reps: 3
- Close your eyes.
- Breathe in over the count of four
- Breathe out for longer than a count of four.
- Repeat three times.
“That longer exhale activates the part of your nervous system responsible for rest and recovery,” says Jones. “It is the moment clients often tell me they feel the most calm they have felt all day. Do not skip it.”
Shop light dumbbells
