Think you might be hypermobile? An exercise rehabilitation specialist says you can protect your joints with these six stabilizing exercises
Master trainer Luke Meessmann explains how best to exercise when you’re hypermobile

Having mobile joints is generally considered a good thing, because it allows you to access a wide range of motion.
Joint hypermobility, however, describes the characteristics of joints that are able to move beyond their typical physiological limitations.
In some cases, these attributes are related to connective tissue disorders, but for most people with extra mobile wrists, elbows, ankles and knees, hypermobility is relatively benign, and can be managed by favoring exercises that build strength and stability.

Here we break down the key points to consider if you suspect hypermobility—along with six exercises that will help protect all your major joints.
Can you self-diagnose hypermobility?
If you suspect that you might be hypermobile, you should always seek a diagnosis from a certified physiotherapist, says exercise rehabilitation specialist Luke Meessmann.
The owner and master trainer at Absolute Studios explains that it's not always easy to self-diagnose.
“The important distinction between being flexible and hypermobile is not just how far a joint is able to move, but how well that movement is controlled,” he tells Fit&Well.
“Often people with clinically significant hypermobility or connective tissue disorders will experience chronic pain, repeated sprains and dislocations or significant fatigue.”
If you notice you're “overly bendy” and have one or more of these symptoms, he recommends seeing a healthcare professional for a concrete diagnosis and treatment plan.
How to exercise when you’re hypermobile
Meessmann recommends spending less time stretching and more time focusing on building strength, stability, body awareness (proprioception) and movement control.
“Pilates (especially reformer) and strength training—ideally under supervision of an eagle-eyed, technique-focused trainer—is a great combo here,” he says.
Whatever form of exercise you're undertaking, he advises to remember these four cues to protect your joints:
1. Avoid hanging at the end-range of joint positions
“Stop before the joint locks out,” Meessmann explains.
For example, you should perform a plank on your forearms with elbows bent, rather than with arms straight, elbows locked out.
2. Prioritize time under tension
Meessmann emphasizes the need to keep reps slow and controlled, allowing you to keep joints aligned and your muscles under adequate tension to build strength.
“Maintain tension on your muscles throughout the concentric (contracting) and eccentric (lengthening) phase of each movement,” he says.
3. Build endurance in your stabilizing muscles
Training your stabilizers is crucial, says Meessmann.
“Think clamshell exercises to activate your glute medius muscle to help stabilize the hip joint and lower back, and isometric holds to improve muscle endurance.”
For the latter, Meessmann points to moves that incorporate an element of static holds, like wall sits, planks, scapular push-ups and farmer carries.
4. Progress load gradually
Increase weight gradually to improve tissue resilience.
“This one is vital,” says Meessmann.
“Once you're able to complete a certain set or rep range consistently well, as per the above pointers, then—and only then—should you look to increase the weight you’re lifting.”
Six stabilizing exercises to protect your joints
To put his advice into practice, while protecting and preserving your joints long-term, Meessmann recommends these six exercises.
Use them to build strength and stability from your ankles to your shoulders.
1. For ankles: Wall sit
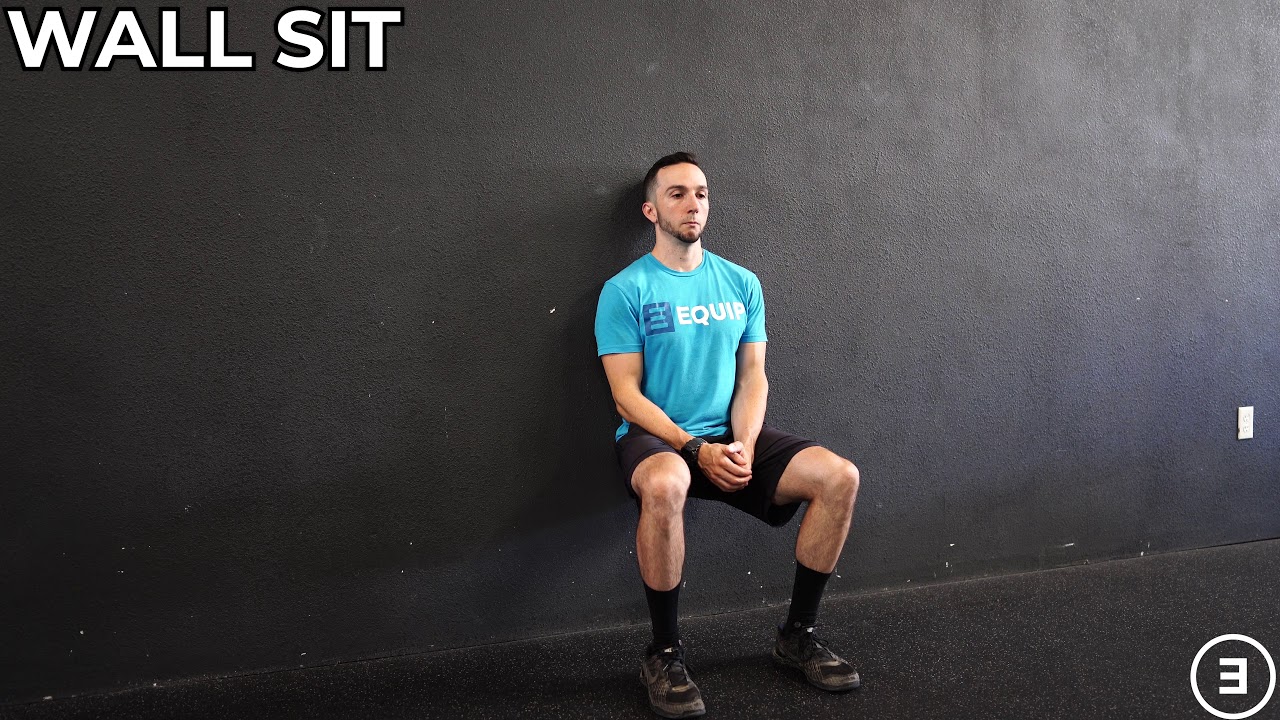
Sets: 1 Time: 30-60sec
- Stand with your back against a wall.
- Walk your feet away, sliding your back against the wall until your knees are bent at 90° and your knees are directly above your feet.
- Hold this position for time, breaking your target time into shorter chunks if required.
Meessmann says: “Wall sits develop lower-limb co-ordination and ankle stability. Make it harder and isolate the hip joints at the same time by progressing this into a single-leg wall sit. In the sitting position, extend one leg straight while keeping your knees aligned.”
2. For knees: Split squat hold
Sets: 1 Time: 30-60sec each side
- Stand with your feet hip-width apart, then step one foot behind you.
- Bend your knees to lower until your back knee is just above the floor.
- Hold this position, keeping your front knee directly above your front foot.
- Maintain an upright posture, placing your hands on your hips or holding a wall or counter for support if required.
- Once the time is up, press through your front foot to return to standing, and repeat on the other side.
Meessmann says: “This challenging unilateral exercise develops quadriceps, glute and knee stabilisation under sustained load.”
3. For hips: Clamshell

Sets: 1-2 Reps: 10 each side
- Lie on your side with your legs together and knees bent.
- Keeping your feet together, lift your top knee without allowing your pelvis to rotate backwards.
- Pause, then slowly lower your knee to close your legs.
- Do all your reps on one side, then switch sides.
Meessmann says: “Clams target the glute medius and deep hip rotators to help stabilize the pelvis.”
4. For the lower back: Side plank

Sets: 1-2 Time: 30-45sec each side
- Lie on your side with your legs together, propped up on your forearm.
- Lift your hips so your body forms a line from head to heels.
- Hold this position, avoiding your trunk from rotating and breathing normally.
Meessmann says: “Side planks target lateral core stabilisers, including the obliques and quadratus lumborum, to protect the spine.”
5. For shoulders: Scapular push-up
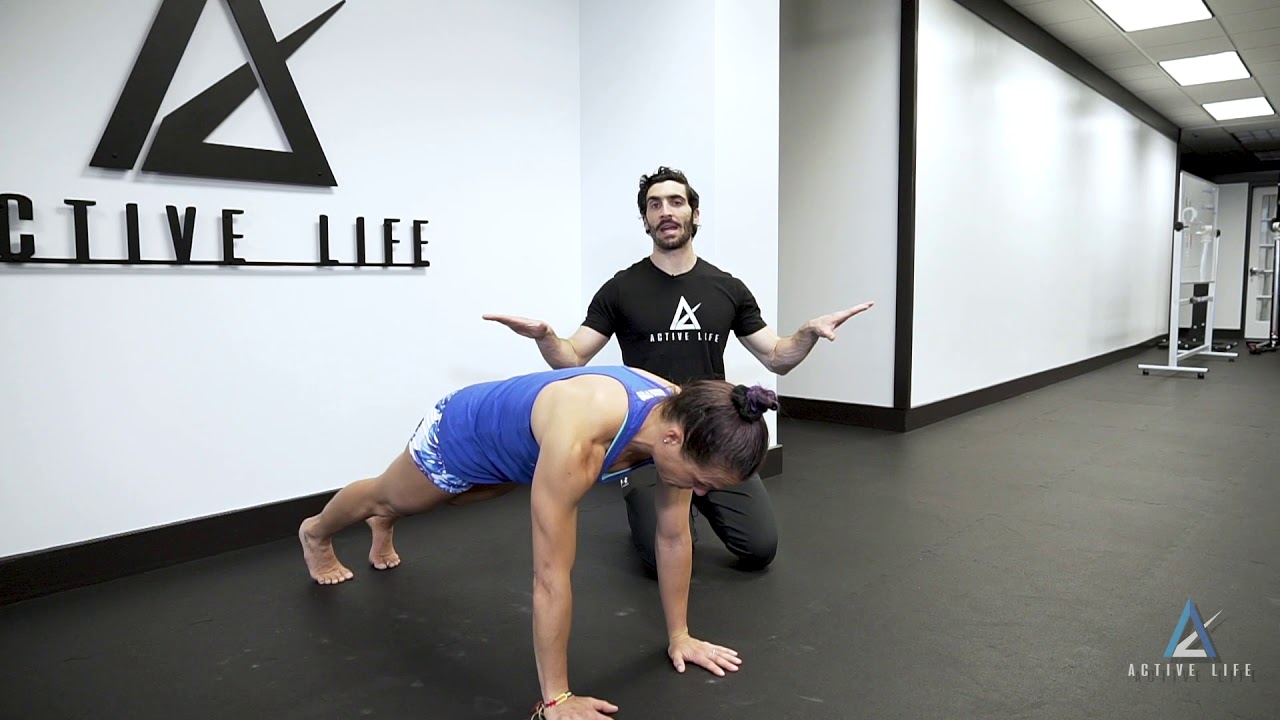
Sets: 1-2 Reps: 10-12
- Get on your hands and knees, with a slight bend in your elbows.
- Step your feet back to your body is in a straight line from head to heels—this is your starting position.
- Gently round your upper back to lift your chest away from the floor.
- Retract your shoulder blades to slightly lower your chest without bending your arms further.
Meessmann says: “This push-up variation targets the serratus anterior muscles around the shoulder blades, while honing scapular control.”
6. For wrists and elbows: Farmer’s carry
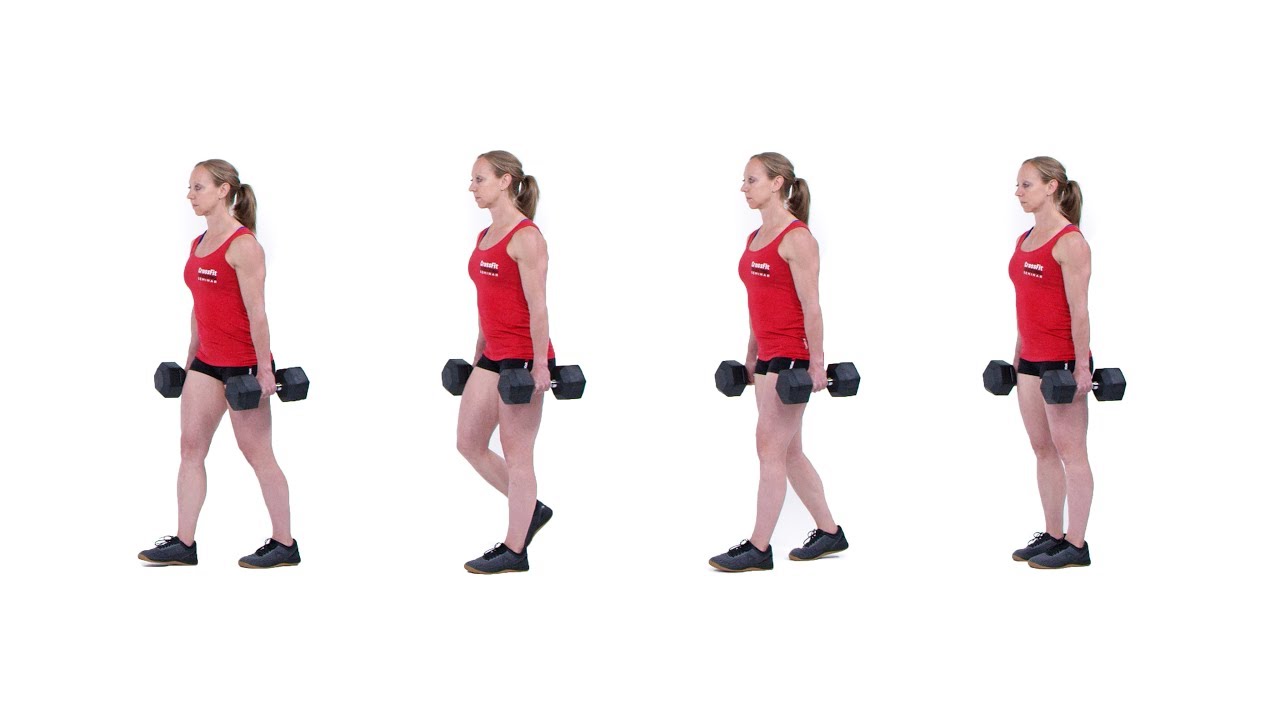
Sets: 1-2 Reps: 30-60sec each side
- Stand, holding moderate to heavy dumbbells by your sides, with your wrists neutral and relaxed, and your chest facing forward.
- Walk slowly with control.
- If your grip strength is failing, lower the weights to the floor. Take a breath or two to reset, then pick up the dumbbells carefully and continue.
Meessmann says: “Heavy carries develop grip strength alongside wrist and elbow stability.”

Luke Meessmann is the owner and master trainer at Absolute Studios in London, UK. Since earning a graduate diploma in science for exercise rehabilitation from the University of Wollongong in Australia, he has amassed over 20 years of experience in the health and fitness industry and spent thousands of hours coaching clients and training other professionals. Meessmann is an APPI certified matwork Pilates instructor and has been working with Dynamic Reformer Pilates since its early days in the UK, helping shape how it is taught through developing training programmes and mentoring instructors. Having dealt with his own challenges around mobility and back pain, he knows first-hand how powerful this method can be.

Follow Fit&Well on Google News and add us as a preferred source to see all our workout ideas and wellbeing advice in your feeds.
