“This routine builds real functional strength”—a pelvic floor expert details the 20-minute routine she uses with every beginner client
Do these nine exercises to restore the foundational coordination between your breath, core, glutes and the postural system, says Dr Caroline Packard


Ever feel like you're just going through the motions when performing exercises?
Dr Caroline Packard, a doctor of physical therapy and founder of Connect Pelvic Floor Fitness, says that’s a sign that your mind, body and breath are out of sync.
“As we age, we don't just lose muscle; we lose the coordination between the breath, the deep core, the glutes, and the postural system that holds everything together,” she says.
“When that coordination breaks down, even people who are technically strong start to feel unsteady, fatigued and less confident in their own body.”
Before she introduces weighted exercises, Packard's programs focus on restoring that coordination.
“It's the foundation of everything I teach with Connect,” she says.
“The exercises change as you progress. They get more challenging, more loaded, more complex; but the foundation never changes: breath first, coordination restored, then build.”
How to do the workout
To complete this entry-level routine you'll need around 15-20 minutes and a few simple props.
“There is no floor work,” says Packard. “Every exercise is done standing or seated using a chair, a wall, a small pillow, and a low step or bottom stair.”
Packard advises that you should exhale during the most taxing part of an exercise.
“That exhale activates the deep core and pelvic floor, turning every movement into a full system workout—not just the muscles you can see,” she explains.
1. 360˚ diaphragmatic breath
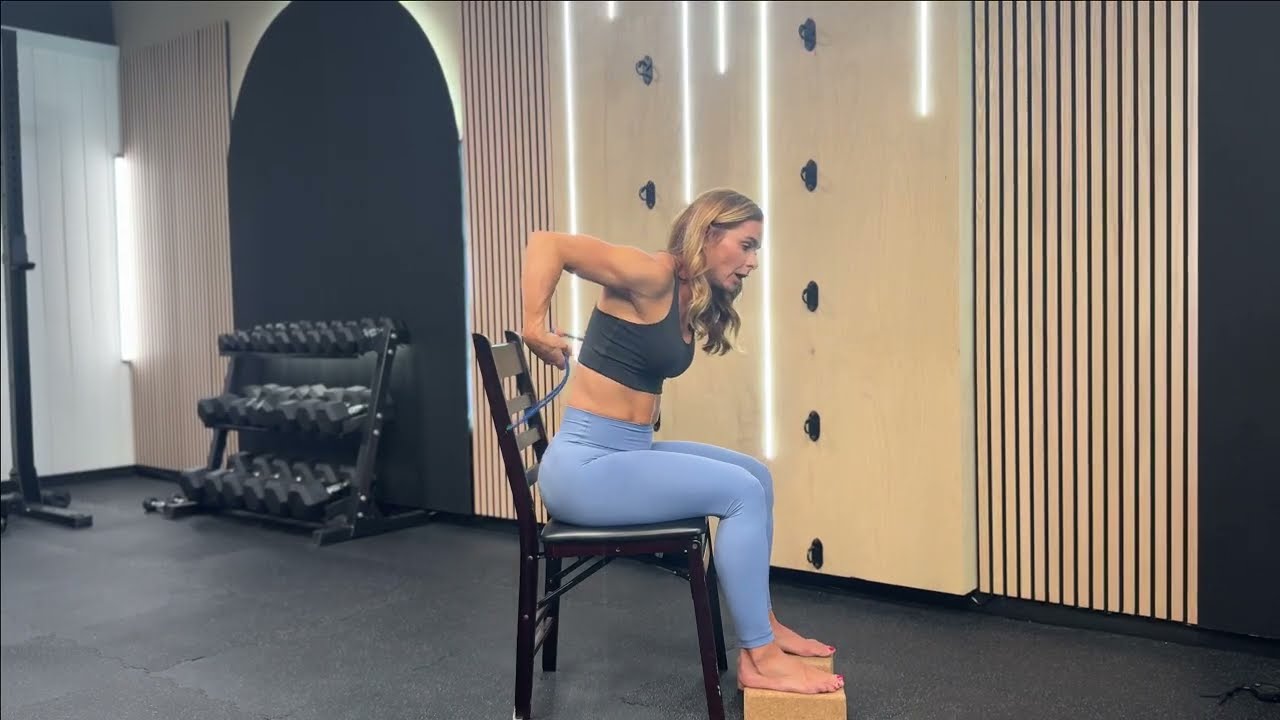
Sets: 3 Reps: 5 Rest: 10sec
- Sit in a chair with feet on the floor.
- Rest your hands on the sides of your ribcage.
- Inhale slowly through your nose for four counts.
- Feel your ribcage expand in the front, sides and back simultaneously.
- Exhale for four counts and feel your ribcage draw inward.
- Pause after the exhale before your next breath.
Packard says: “Don't skip this section. For adults who have spent years chest breathing—which is most of us—this is the reset the body needs before it can load effectively.
“If your hands aren't moving outward on the inhale, keep breathing until you feel them expand.”
2. Seated marches
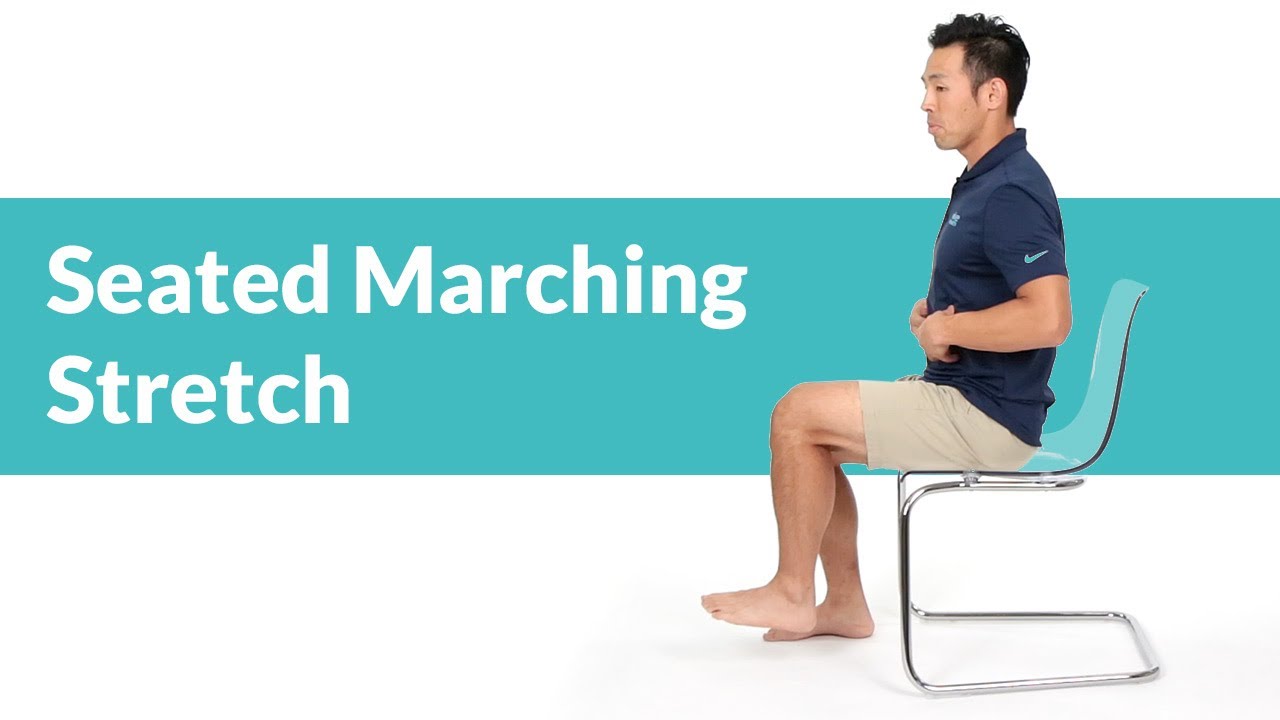
Sets: 2 Reps: 10 each side Rest: 30sec
- Sit at the front edge of your chair, feet flat on the floor hip-width apart.
- Inhale to prepare.
- Exhale and lift one knee slowly toward the ceiling, keeping the pelvis level and the spine straight.
- Don't let your hip drop or your torso lean.
- Hold briefly, then lower slowly.
- Repeat on the other side.
Packard says: “The goal is not [knee] height, it's control.
“A small, controlled march with a stable pelvis is worth far more than a high kick with a wobbling trunk. As this becomes easier, add a light dumbbell resting on the thigh for additional load.”
3. Seated pillow adduction
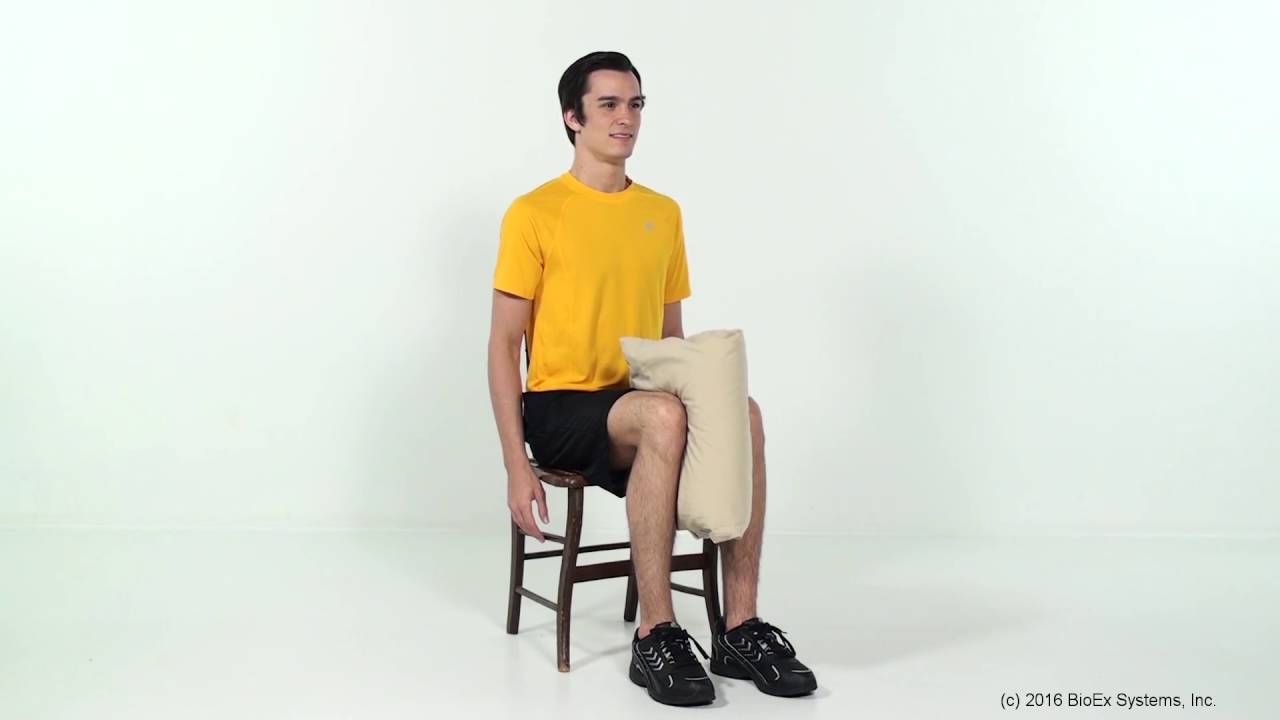
Sets: 2 Reps: 10 with a three-second hold Rest: 30sec
- Sit at the front edge of your chair, feet flat on the floor hip-width apart.
- Place a small pillow or rolled towel between your knees.
- Inhale to prepare.
- Exhale and gently squeeze the pillow between your knees.
- Hold for three seconds.
- Inhale to slowly release.
Packard says: “Think of this as waking up the inner architecture of the hip before you ask it to work hard.
“For [older populations], the adductors are almost always underactivated, and when they're weak, the pelvis loses the stability it needs for safe single-leg loading and balance control.”
4. Standing foot taps
Sets: 2 Reps: 10 each side Rest: 30sec
- Stand and face a wall.
- Rest your fingertips on the wall for support.
- Position your feet hip-width apart, with a slight bend in the knees.
- Inhale to prepare.
- Exhale and slowly tap one foot out to the side, keeping the pelvis level and the trunk upright.
- Return to standing with control.
Packard says: “Tapping the foot out to the side trains the outer glute muscle that helps with balance to prevent falls.
“When those muscles are weak, the pelvis drops on the standing side with every step, creating the instability that makes older adults vulnerable to falling sideways.
“As this becomes easier, slow the return phase or add a light ankle weight for additional load.”
5. Sit to stand
Sets: 3 Reps: 8-10 Rest: 45sec
- Sit at the front edge of your chair, feet flat on the floor, hip-width apart.
- Cross your arms over your chest or raise them in front.
- Inhale to prepare.
- Exhale and push evenly through your whole foot as you stand, ensuring the knees don't cave in as you stand.
- Inhale and lower, hinging at the hips to sit back down.
Packard says: “This is the most important exercise in this entire routine, and one most people do dozens of times a day without thinking about it.
“Research shows that the ability to perform this movement with control and without assistance is one of the strongest indicators of long-term mobility, fall risk and longevity.
“The exhale on the way up is non-negotiable. That breath coordination automatically activates the deep core and pelvic floor, turning this into a full system exercise rather than just a leg movement.
“As the move becomes easier, slow the lowering phase to three to four counts. That eccentric control is where real strength is built.”
Packard also advises that you watch out for two common compensations: the chest leaning too far forward on the way up, or the knees caving inward. Either means the glutes aren't firing properly.
6. Wall-supported split squat
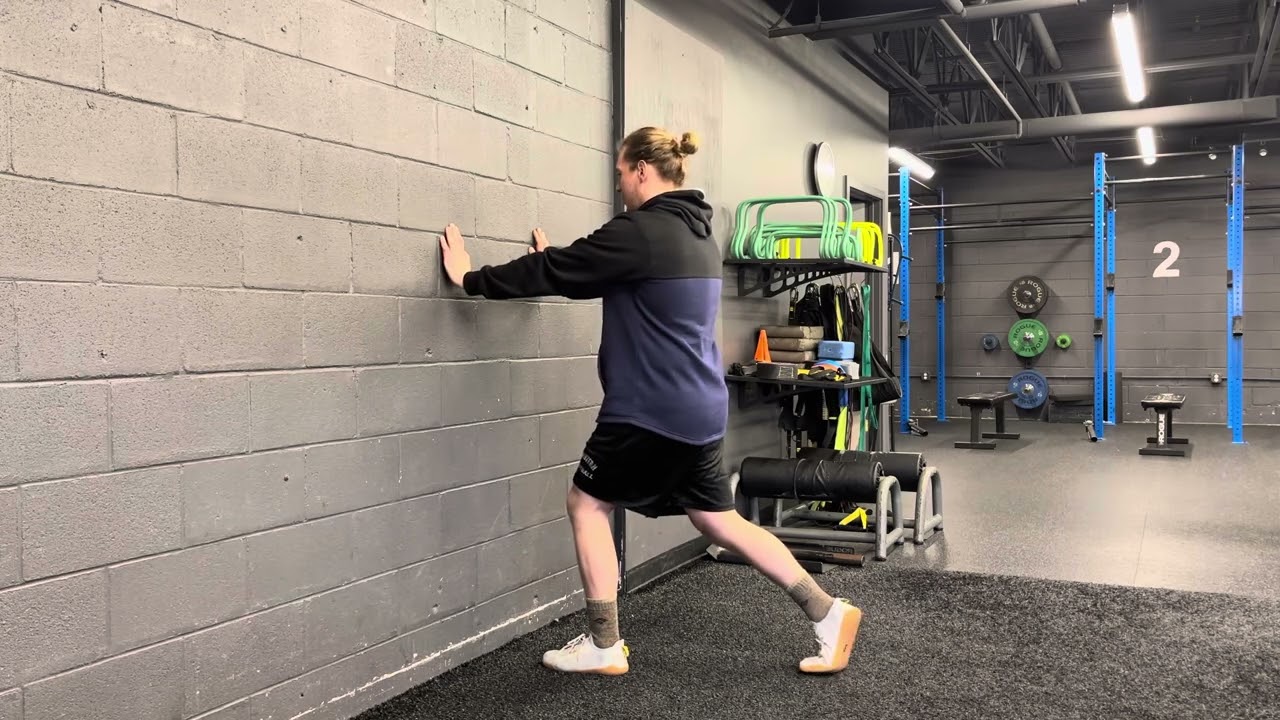
Sets: 2 Reps: 8 each side Rest: 45sec
- Stand facing the wall, fingertips resting lightly on the surface.
- Step one foot back, about two-thirds of your normal stride length.
- Keep both feet pointing forward.
- Inhale to prepare.
- Exhale and slowly lower the back knee toward the floor, only as far as it is comfortable.
- Keep the front knee tracking over the front toes, the trunk upright, and the pelvis level. Don't let the front heel lift.
- Inhale, then exhale and push through the front foot to stand.
Packard says: “The split squat is single leg strength training made accessible.
“By staggering the feet you're loading one leg at a time, which is exactly how the body works in real life.
“Every step you take, every stair you climb, every curb you step off is a single-leg loading event.
“This exercise builds the quad, glute and hip strength that makes those moments feel controlled and confident rather than precarious.”
7. Low step-up

Sets: 2 Reps: 8 each side Rest: 45sec
- Stand facing a low step or bottom stair, with a railing or wall within reach for support.
- Place one foot fully on the step.
- Inhale to prepare.
- Exhale and hinge slightly forward from the hips, maintaining a straight spine, as you drive through the heel of the elevated foot to bring yourself up to standing.
- Inhale and lower back down with control, hinging from the hips as you descend.
Packard says: “This is the most functional exercise in the routine, because stairs exist in almost every home, every building, and every sidewalk.
“By leaning slightly forward into a hinge position as you step up, you're loading the posterior chain [the glutes and hamstrings] in a way that protects the low back and builds the kind of hip strength that directly reduces fall risk and supports long-term independence.”
8. Kickstand single-leg stance
Sets: 2 Reps: 3 x 20-30sec hold each side Rest: 20sec between holds, 30sec between sets
- Stand near a wall with fingertips resting lightly on its surface.
- Place the toes of one foot just behind you. This is your kickstand foot—your weight should stay centered over the other foot.
- Inhale to prepare.
- Press through the ball of the kickstand foot, without shifting your weight back.
- Hold that position and breathe.
Packard says: “Most balance exercises ask you to just stand on one leg and hope for the best.
“This one gives you something to actively do, and that makes all the difference for [older] populations.
“By pressing the forefoot of the back foot into the ground while staying centered over the standing leg, you're activating the entire lower leg muscle system: the peroneals, the tibialis anterior, and calf complex.
“These are the muscles that prevent lateral ankle roll and are the last line of defense against a fall.
“As confidence builds, reduce your reliance on the wall—fingertips first, then one finger, then hovering just above the surface.”
9. Wall push-up
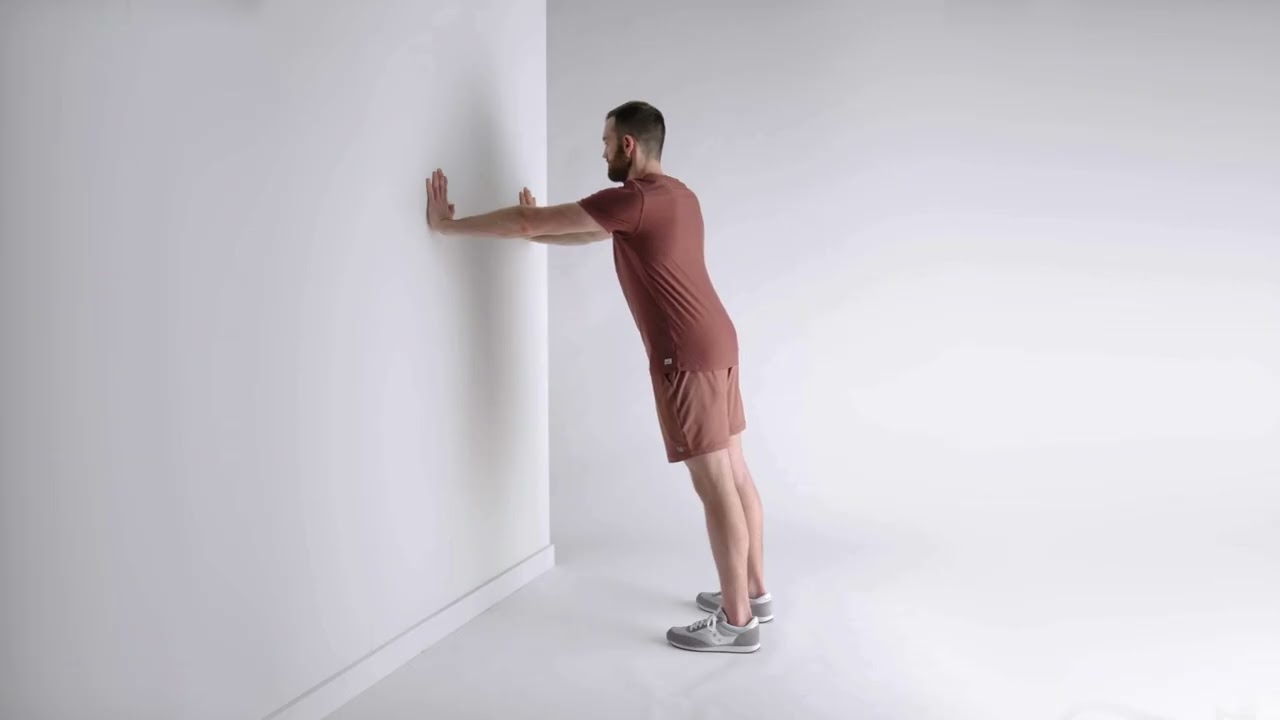
Sets: 2 Reps: 10-12 Rest: 45sec
- Stand an arm’s length away from a wall with feet hip-width apart.
- Place both hands on the wall at shoulder height.
- Inhale, bend your elbows and move your body toward the wall.
- Keep the core engaged, the pelvis neutral, and the body in one straight line.
- Exhale and press through both hands to return to standing.
Packard says: “Upper body strength is often overlooked among [older populartions]—yet it shouldn't be.
“Pushing strength directly supports the ability to get up off the floor, push open a heavy door, and catch yourself if you trip.
“It also loads the bones of the wrist, forearm and shoulder in a way that supports upper body bone density over time.
“As this becomes easier, walk your feet further from the wall to increase the challenge.”

Dr Caroline Packard DPT is a doctor of physical therapy with more than 15 years of clinical experience and the founder of pelvic floor training app Connect Pelvic Floor Fitness. She is also a certified yoga instructor, lifelong athlete and mother of three. After navigating her own experience with pelvic floor dysfunction following pregnancy, she built Connect to serve as a training platform that treats the pelvic floor as the foundation of total-body strength.
